Type your question here!

Wednesday, April 4, 2012

Orchard April Todo List

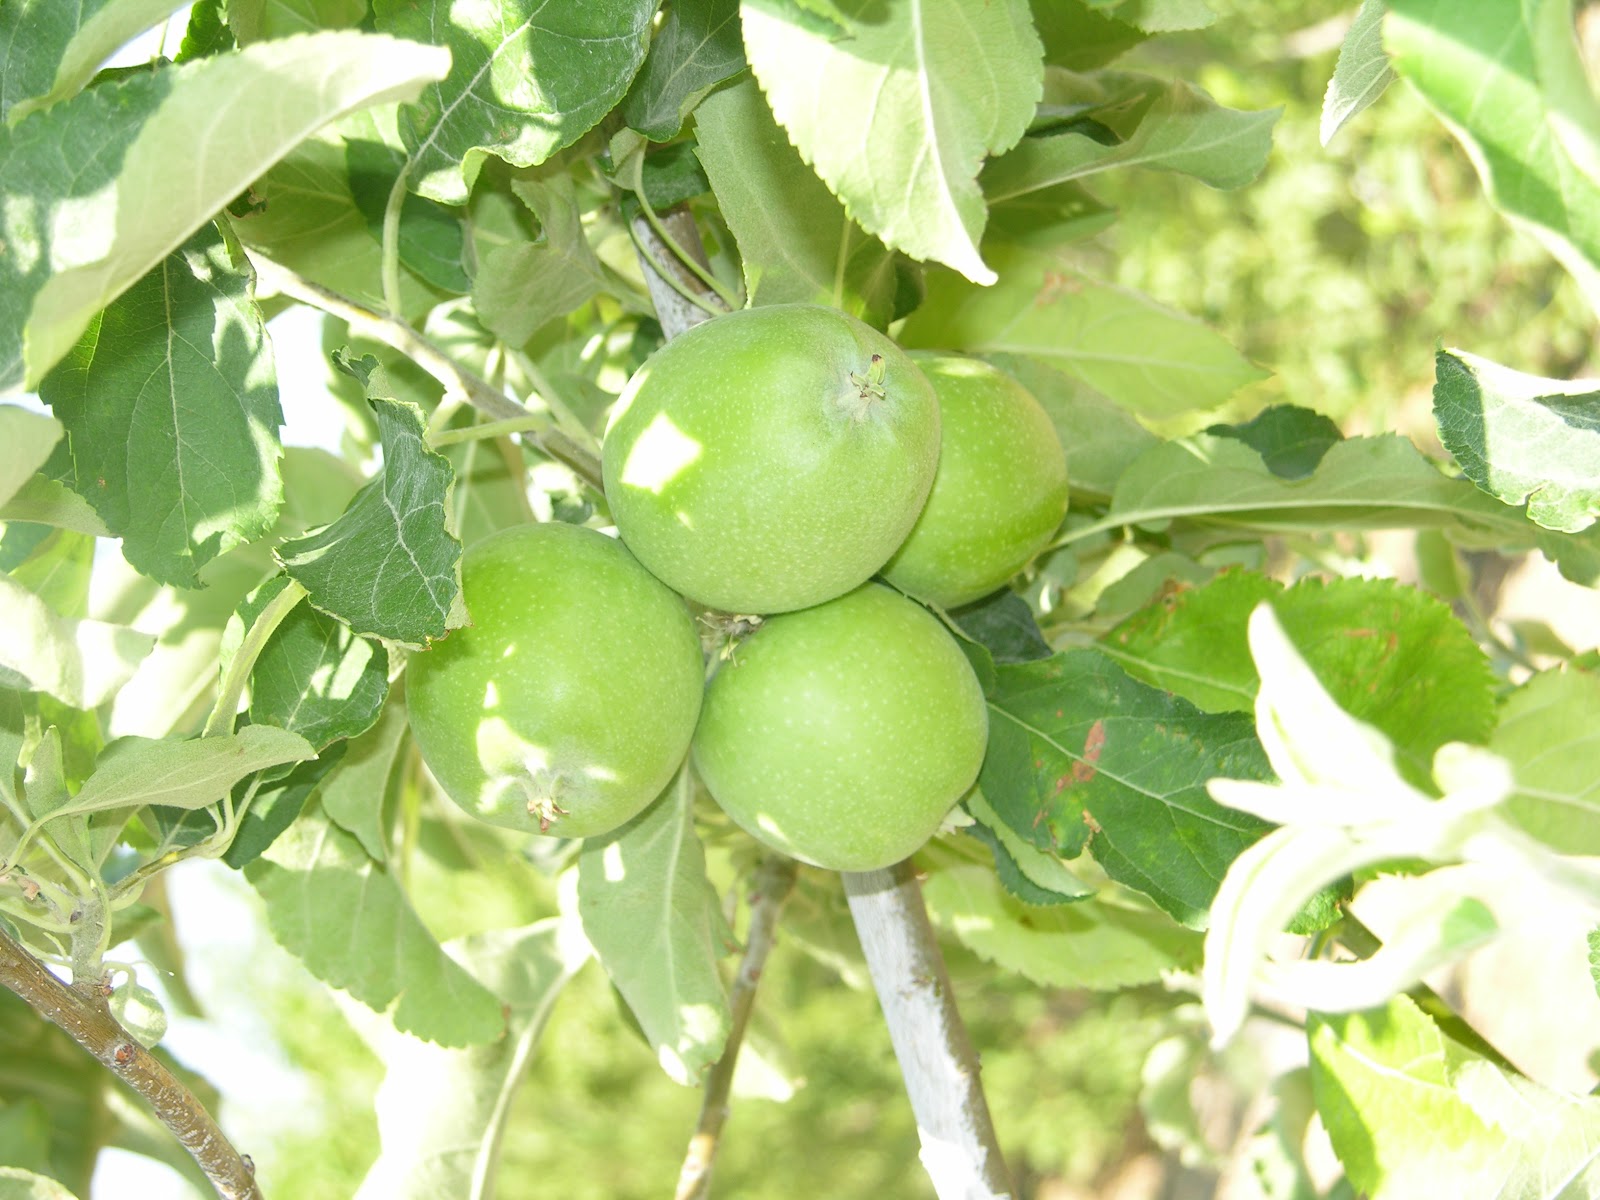
This is what you are trying to avoid by thinning apples


Apple before thinning
•     Thin fruit, apples and pears. You should be removing or thinning fruit so that the resulting fruit receives more “food” reserves from the leaves and gets larger. The larger the fruit, the greater the distance between them. Nut trees are normally not thinned. Leave one fruit per cluster in apples and European pears. Peaches and nectarines are four to six inches apart. Asian pears are thinned very early; sometimes in the flowering stages if you know you have had good fruit set in the past; perhaps leaving no more than one fruit a foot apart if you want Japanese-style large fruit.


Apple after thinng
•     Apply calcium chloride sprays to pears and apples susceptible to bitter pit or corky spot, five times in the spring, spaced about one to two weeks apart. Bitter pit or corky spot might appear on Comice pears and Mutsu apples for instance. These are sunken brown spots in the flesh just under the skin. Food grade calcium chloride is applied as a spray to the tree (focused on spraying the fruit) along with a wetting agent to aid in absorption through the skin of the fruit.

Corky spot in Comice pear
•     Thin corn to 12 inches apart. I like to plant seed fairly close together in March and then remove plants so the remaining plants are 12 inches apart in the rows. No, you cannot replant these plants to fill voids. Kernels in the ears fill in better if you have a minimum of three rows of corn since they are wind pollinated. Corn likes lots of nitrogen fertilizer applied frequently.

•     Weeding. Stay on top of your weeds and remove them as soon as you see them.

•     Flower thinning of Asian pears. Mentioned earlier.

•     Harvest asparagus daily. Now that it is getting warmer the spears are growing faster and need to be harvested more often. You should stop harvesting asparagus after about 8 to ten weeks of removing spears. After harvest you must let the spears mature (let the spears become that five foot tall, ferny growth) which is cut down in December or January.

•     Wind protection on the emerging corn. If we get some high winds this time of year and you planted corn in a potentially windy location the wind can flatten your corn rows. A wind barrier such as some fencing like chain link with pvc slats or chicken wire with vines can prevent this from happening.
Pull or cut off onion flowers

•     Mulch. As temperatures rise and with our low humidity surface mulches can help keep seeds planted in the summer from drying out and not emerging. Straw, shredded paper and other surface mulches can preserve soil moisture and aid in more complete germination. Presoak large seed for 12 hours in cool water prior to planting.

•     Fertilize corn every four weeks.

•     Pull onion flowers. Remove any flowers from onion plants and use them in cooking or as garnishes to keep them from robbing energy from developing onion bulbs.

•     Mulch garlic and onions. Mulching garlic and onions before it gets hot will aid in getting larger bulbs and reduce stress.

•     Fertilize onions and garlic and all vegetables in the ground every 3 to 4 weeks. If you used a good fertilizer at the time of planting then all you need is a high nitrogen fertilizer. If you used compost or decomposed manures you may be able to skip these applications.

•     Harvest beets and peas. Peas and other cool season vegetables are coming to the end of their growing season. Replant in mid fall.
Pheremone winged trap in tree. Pheremone lure is orange
inside the trap.

•                  Set pheromone traps for peach twig borer (PTB). PTB causes wormy peaches, nectarines and apricots. You first see their evidence on the occasional death of new growing shoots on these trees. Traps help you to reduce their populations or determine when or if spraying is required. I would suggest purchasing lures and complete wing traps from Alpha Scents: (http://www.alphascents.com/Lures/lures.html; http://www.alphascents.com/Traps/traps.html#wing )

Insects caught on sticky insert on the bottom of
winged trap. Here the lure is hung from the bottom
of the top of the trap. I prefer placing directly on the
sticky bottom instead.
•     Spray for peach twig borer if necessary using BT sprays or spinosad.

•     Spray for Western flower thrips on nectarines using spinosad.

•     Spray insecticidal soap for artichokes and aphids. Spray the upper and lower surfaces of the leaves.

•     Stake tomatoes, peppers to keep fruits from lying on the ground. Expect more fruit losses if plants are allowed to sprawl on the soil surface.
Green almond stage for harvesting immature nut

•     Mulch tomatoes, peppers, eggplant. These plants will benefit from surface mulches.

•     Label vegetables in vegetable plots. Keep track of what varieties you are planting so you know which ones to purchase or not to purchase in the future.

Immature almond nut in the "green" stage
•     Green almond harvest. Almonds can be harvested green when they are very small (1/2 inch long) and the entire small green nut can be eaten raw or in salads or allow the nut to enlarge and harvest the immature nut for salads or cooking such as stir fry.

•     Young garlic harvest. If garlic was planted 2 inches apart in the fall you can now harvest immature garlic (before the bulbs have enlarged) and use them for roasting or grilling resulting in the remaining garlic plants four inches apart and harvested when fully mature in May or early June.
Young garlic stage

•     Fix irrigation leaks.

•     Prune palms.

•     Reapply iron where necessary or spray iron. If you see some trees or grape vines starting to yellow on new growth then reapply iron chelate to the soil now. Spraying fruit trees now with iron may result if iron-stained fruit.

•     Dig up root suckers. Remove suckers as you see them sprouting from tree bases or the soil a foot or two from the tree.

•     Summer prune. Watch for trees that are extremely dense with new growth. If the canopy is getting very dense and shades the interior of the tree then remove unnecessary new growth by pulling down on it and letting it decompose on the ground if you are using wood mulch.

Orange Tree Leaves Losing Green Color (Yellowing) With Green Veins


Q. I have 9 orange trees on my property and pamper them like my “kids”.  One of them (perhaps two) is losing the green color in the leaves although the veins are staying green in color.  I would like to send you a couple of leaves for your inspection as I have tried to trouble shoot the problem using the computer and pictures. A local nursery disagrees with my request for manganese sulfate to resolve the problem. Would you send me an address so that I can send a few leaves for your inspection and suggestions?

A. A picture of the leaves will work just as well as sending me a sample. I will be out of the country and so samples will probably not reach me.

            Nine times out of 10 a yellowing leaf with green veins, particularly if it is the newer growth at the ends of the branches, is iron chlorosis and not typically manganese or zinc. The manganese sulfate would be used for a manganese deficiency or you could use a manganese chelate.

            You can sometimes take an iron solution with a few drops of Ivory liquid detergent and, making sure the iron solution is slightly acidic with a little bit of vinegar, dip the leaves in the solution for a few minutes. You should see a color change in the leaves in about 24 hours or less.
            Otherwise you can take some liquid iron chelate with a little bit of detergent like Ivory liquid and spray the leaves three or four times over a period of a couple of days. This will also turn them a darker green if it is iron.

            If it is something other than iron, it won't do anything. Then go ahead and try your manganese application.

            If this color change occurred during the winter it is possible it could be cold damage. This appears more like a bronzing of the leaves rather than yellowing. I hope this helps.

Planting Ocotillos So They Don't Die


Q. Ocotillos, the most beautiful plant in Nevada. I have tried twice to grow this and not even one sign of life in 5 years. Now I'm trying at a different home.  I wonder where am I failing?
            The soil is mostly poor in Henderson and sandy. I have lots of sun but I avoid western afternoon sun. I also have an area with partial shade. Is this a failure to properly fertilize?  Watering?  A local nursery indicates I'm doing it correctly but it is a tricky plant. (Now they tell me).       

A. These ARE tricky plants and not easy to transplant if you are not familiar in dealing with desert plants and cacti. It is also possible to pick up dead plants from the nursery. When they have no growth on them it is very difficult to tell if they are living or not.

            One method you can use is the thumbnail method. You can use your thumbnail and scrape a small layer of bark from the stem. It should be green under it and scrape away fairly easily. If it does not, or it is brown under it, then it very well could be dead.

            If you want to know if the plant is at all alive, check in several places including near the base closest to where the soil would be and look for green as well. When planting it, make sure it is securely staked into the soil so the roots do not move.

            Water around the base of the plant no more frequently than about once every two weeks during the summer. These plants are easily propagated or started as cuttings, stem pieces cut and planted directly into the soil. The trick is not to water so often the stem rots and dies.

            I attached a pamphlet on how to establish ocotillo from the Tucson Cactus Society. I am not a big proponent of wetting the canes but the Tucson cactus society is.

www.tucsoncactus.org/pdf_files/TCSS_Ocotillo_Planting.pdf


Planting Ocotillo -

Espalier or Trellising Fruit Trees or Grapes Can Reduce House Cooling Costs


Q. I just saw this video on the internet on espaliering fruit trees. It is located at  http://www.youtube.com/watch?v=MP7voRKFUoE
Is that something that would work well in Las Vegas or just cause more stress to the tree? I have a small area on the south side of my house where the A/C unit is and would love to get a green wall of sorts on there to keep our bedrooms from roasting in the summer. I had thought about grapes, but the espaliered fruit trees might be an option.

A. Great video! Yes, John. It will work here. Just keep your water emitters to the outside of the fruit trees and not near the foundation. We have high salts and don’t want to undermine the foundation or walls used for trellising. This will help direct roots away from the structures.

            Make sure you whitewash the limbs as they can sunburn in hot, very exposed locations.

            I can see you are thinking now in terms of microclimates and growing spaces in the yard. Plants are flexible. Make sure they have enough sunlight to be productive, match the plant to the microclimate and manage the plant to make it fit and make sure you commit the time to doing it. It is that simple.

Rosemary Bush Very Susceptible to Dieback if Overwatered


Rosemary dieback from reader
Q. Can you diagnose what is wrong with my rosemary bush?  We have two rosemary bushes which are less than three-feet apart.  One is beautiful; the other has die-back in the center.  The one that has the die-back was replaced last year because the previous one had the same problem.      Both of these plants receive the same water and the same fertilizer.  When I replaced the rosemary plant last year, I did a 50/50 mix of compost and native soil.  I don’t see any pests on either of the plants.  Any suggestions?

A. I looked at the pictures. There are no specific pests that would cause this type of damage on rosemary. The most likely culprits would be physical damage to the stems (broken stems) or root rot or collar rot from either planting it too deeply or keeping the soil around the one with dieback too wet.
Healthy rosemary of reader

            If the soil was heavily amended with mulch or compost and it was planted in this then it is possible it could have been planted too deeply while the other one was not. Sometimes plants will sink in the planting hole if the soil is too "fluffy" at the time of planting.

            This sinking and soil consequently coming in contact with the stem due to follow-up waterings, can cause the main stem or side stems to decay and then entire stems can dieback.

            I would carefully lift the plant out with a shovel and examine the main stem or trunk and side stems and see if they were planted too deeply. Rosemary is very susceptible to collar rot or keeping the soil too wet. If the stems are rotten, dispose and replant in a new location.

Fig Cuttings and Transplants Benefit from Slow Immersion Into Harsh Outside Environment


Q. I have several fig cuttings that are growing in a vermiculite and perlite mix inside the house.  Attached is photo. When is the best time to move them outside and transplant them into the ground? Or do I have to go through an interim stage of a small pot with potting soil first?

A. I would move them outside into an area protected from late afternoon sun and wind as soon as you see signs of new growth but leave them in the containers. This is called “acclimating” the transplants.

            All transplants grown inside the house or in a greenhouse should be acclimated to the outside environment before planting. This will improve the success of your transplanting and lessen transplant shock.

            You could put them in a cardboard box for instance but they need to be exposed to the outside environment gradually before they are planted in full sun and full wind. Plant them in the ground with amended soil after 2 to 3 weeks of acclimating. At that time they can handle full sun and some wind.

            Stake them if they need to be staked because a large canopy that can catch the wind and disturb them or potentially uproot them. Lightly fertilize them. Begin to deep water them with 1 to 2 gallons of water at each watering. A good sign of success is vigorous top growth.

Tuesday, March 27, 2012

Butterflies Pollinating Plum Trees?


Butterflies pollinating readers plum tree
Q. Attached you will find a picture of small butterflies on our plum tree. There are hundreds of them. Are they pollinating our trees? The bees were here, but these have taken over.

A. I have seen this before a few years back in our orchard as well and they can do a lot of pollinating when it happens. It normally does not last very long. There is usually a burst of butterflies for a couple of weeks and then it is over.

            The development of the adult butterfly must correspond to the opening of flowers that require insect pollination. In some years, like now, butterfly development is perfectly coordinated with certain varieties of fruit trees.

            Pollinating insects can include bees, wasps, butterflies, moths, beetles, flies and other insects. By far the most consistent pollinators are our bees and specifically the domesticated honeybee.

Fruit Tree Not Producing? Get Rid of It!


Q. I live in the Mesquite area and have two non-producing nectarines. One is a 7 year old LeGrand and the other a 4 year old Gold Mine nectarine. Both get plenty of flowers but no fruit. They are intermingled with plums, peaches, and apricots; all producers. Any idea what could be wrong?

A. First of all, thank you for keeping track of the variety of fruit trees you have. I cannot tell you how many times I have talked with people and they have no idea what variety of fruit tree they planted. Selecting the right variety makes a world of difference in the quality of the fruit you produce.

            I will tell you right now I have tried both of those varieties of nectarine and do not give them very high marks for flavor in our climate. I would get rid of them now and put in something better. I know Le Grand is an old time favorite in other parts of the country but there are better varieties out there.

            I also had one nectarine tree, unlike yours, that just would not flower for us. Lots of healthy growth, but no flowers. It wasn’t the variety because we had five of this tree and the other four did produce. I gave it a five year chance and then replaced it. It should have gotten just three years but I felt generous. Generally speaking, if your fruit tree does not produce after three years of flowering, or you get three years in a row of bad tasting fruit, REPLACE IT.

            If you want to stick with nectarines (this may turn into a regular spray program for thrips control down the road) then I would look very closely at Arctic Star, a white-fleshed nectarine or, for yellow-fleshed types, Desert Dawn, Desert Delight or Double Delight. We have given all of these very high marks in fruit quality and they are excellent producers.

Don't Throw Out Your Thinned Peach and Nectarine Fruit

Baby peach fruit for pickling
Green almond ready for pickling or eating fresh
If you have peaches and nectarines, now is the time to start removing fruit so that the remaining fruit gets larger. Remove fruit that are gumdrop sized so that the fruit remaining on the limb is at least four inches apart. If the tree is not terribly healthy then remove more fruit than this.


If you thin your peaches or nectarines you will end up with "baby peaches" Pick early so they are no larger than a large olive, try pickling them and packing them in oil for home use just as you would olives. They do this in the Mediterranean and Middle East where some people do not let any fruit go to waste.
Baby donut peaches
You can also do this with green almonds. Harvest the almonds when they are no longer than about one inch. The seed inside should still be translucent with a white coat. If you want a recipe to try with babby


If you want a recipe to start with, I found this one on the internet in the Ligurian style.
http://www.aglaiakremezi.com/recipies/mezze-appetizers-and-salads/pickled-tsagala-green-almonds.html

Las Vegas Banana Update

Harrison's bananas forming
Harrison's banana male flower (actually
located under the purple bract)

Ann's Cavendish banana in Las Vegas

Ann's Banana another view

Sunday, March 25, 2012

Make Your Peaches Larger by Thinning Enough


Readers nectarine tree
Q. My 23 year old nectarine is always loaded with fruit. I sent you a picture. I usually "thin" out the fruit when they're quite small but I can't seem to thin out enough so they get bigger. Should I remove the flowers now before the fruit forms or wait until the fruit is formed and then attempt to thin out? I know the tree in the picture is ugly but the fruit it bears is delicious.

A. I am not concerned with the looks of the tree but I am concerned that it has enough canopy to shade the branches which helps prevent sunburn on the limbs and fruit. Sunburn damage on limbs in turn attracts boring insects and increases the decline of the tree.

            Since the leaves are responsible for collecting solar energy and converting this solar energy into chemical energy in the form of sugars, the number of leaves compared to the number of fruit is a pretty critical relationship if you want larger fruit. You want anywhere around 50 to 70 healthy leaves for every good-sized fruit.
Peach before thinning

            I know you won't go around counting the leaves to determine the number of fruit to remove but it gives you an idea that if you don't have a good canopy of leaves, then you will have to remove a lot of fruit.

            This is why it is important for your tree to have good canopy development from proper pruning. This allows sunlight to penetrate on to leaves inside the canopy. Leaves growing in shade produce fewer sugars and may actually rob sugars from developing fruit.

Peach after thinning
            This is why we tell people to leave fruit spaced an average of about 4 to 6 inches apart on the fruit-bearing limbs. Start removing fruit when they are the size of your thumbnail.

            I would not remove flowers as an alternative to thinning the fruit. You don't know which flowers are going to set fruit and which ones will not. You might leave flowers that don't set any fruit.

            Harvest your fruit when they are still firm but have developed their full-color. It is acceptable that there is just a little bit of green left on the fruit at the time of harvest. Depends on the variety.

            This helps avoid a lot of bird damage to the fruit. The birds like to get them when the sugar content is starting to climb. Following Murphy’s Law, this is nearly always the day before you decide to pick them. Pick soft fruit at the first sign of bird damage and let undamaged fruit ripen on the kitchen counter for a couple of days. After they ripen, put them in the refrigerator to help preserve their freshness.

Baby Fruit Trees: Pull Off or Leave the Fruit On?


Q. Help! I planted my bareroot Pink Lady last February 4th and now it's flowering! I'm happy to see the blossoms; they're pretty and smell good. This is the first time I planted an apple tree, now I don't know what to do next. Should I just let it blossom and fruit?

Pink Lady apple from the North Las Vegas Orchard
A. Just be calm and take a deep breath. It is okay for your tree to flower. If you go back to some of the old textbooks on fruit trees it may tell you that some trees take six to eight years to bear fruit. Well there is some truth to that but with newer varieties bred for precociousness (early production) and budded on to dwarfing rootstocks it is not unusual to have fruit trees begin to bear fruit after only a year or two in the ground. The question then becomes is it wise to leave the fruit on the tree or remove it?

            Some very good gardeners are of the opinion that all fruit should be removed so that the energy of the tree goes into tree growth rather than split between tree growth and fruit production. Others say to let the tree go ahead and produce some fruit but remove most of it for the same reason.

            I am of the latter. If you have some fruit being produced then enjoy a few the first year, a few more the second until you maximize its production for its size. As it increases in size it can be allowed to carry more fruit.

            Remember to whitewash the tree to help prevent sunburn. Cover all the branches and the trunk with diluted white latex paint. This is a mixture, 1/1, with water and make sure you cover the west and south sides of the trunk and tops of the branches.

            Let it flower. Thin the fruit to one apple per cluster as soon as the fruit forms. Keep mulch at least 6 inches away from the trunk the first few years. Remove the stake this fall. That’s about it. I hope you get a couple of fruit this year.

Terry Mikel Joins Xtremehorticulture Blog

Hello, my name is Terry Mikel and I had a position similar to Robert Morris' for the University of Arizona Cooperative Extension in Maricopa County (Phoenix is the main city).  Over the years Robert and I have developed a relationship both professionally and personally.  He kindly asked me if I might help a bit while he's off on another one of his fascinating adventures, this time in Afghanistan.

In our conversations I would like to help with some with queries from the lower desert regions and maybe banter a bit with him on some of the issues that might arise.  We don't necessarily agree on everything or how to do everything.  That might add some spice and will keep both of us honest.

Additionally he thought some explanation about my 'facename' would be in order.  It's pretty simple, like almost every gardener, plant person or human I have certain unexplainable favorite plants and for me the Genus Puya is one.  It goes back years to when Dr. Bill Feldman, Director of the Boyce Thompson Arboretum (we were graduate students together) called me to come out and see him.  He did not say why and when I got there we took a walk through the cactus area and off the trail to behind a rock formation.  Coming around the rock there it was, a Puya berteroniana in full bloom.  It was the first time it had bloomed and until then they weren't sure which Puya it was.  It was spectacular and my passing knowledge of the Genus changed to a real passion for it.  They are in a terrestrial growing sub-family of the Bromeliad Family growing in the Andes Mountains from the foothill up to about 9,000'.  A cousin grows in the Chihuahaun Desert called Hectia.  One reason I like them is the one reason for most of my favorite plants, they don't look like much and the bloom comes as a surprise with little regard for weather,  conditions or our inputs in general.  That's what cool about Puyas for me.

Check them out and see the strange and wondrous diversity of the Genus Puya and you folks in the higher desert will have a much easier time growing them if the want strikes you.

Any way I am honored Robert asked me to join you all and I look forward to interacting back and forth.

Monday, March 19, 2012

Pistachio Pollination and Pruning to Keep it Smaller

I will add some photos next week.

Q. My husband asked me to contact you about how to trim our pistachio nut tree and how to get it pollenated.

A. You can still do some light pruning on fruit and nut trees. On pruning your pistachio I would cut back the new growth to about 18 inches above where you see the spurs growing. If this is too severe, then I would just cut back last year’s growth so that it is only about 12 to 18 inches long.      

Pistachios come as both male and female trees (Peters is the male; Kerman is the female). You will need a male tree somewhere close by since they are wind pollinated. The male and female may be planted in the same hole, about 18 to 24 inches apart, but the male tree is more vigorous and will have to be cut back harder than the female to keep it under control.

            If planting in the same hole and you should put a male tree on the north side so that the female, the less vigorous of the two, receives more sunlight. Otherwise you will have to rely on a male tree from a close neighbor or plant your own.


Almond Nut Drop and When to Spray an Insecticide


Leaffooted plant bug on pomegranate with babies (nymphs)
Q. Several months ago you answered my question as to what was affecting the loss of all my almonds in my almond trees. You said I should apply the insecticide Sevin for pest control. But when do I apply the Sevin? My almonds are doing well now but they always do well now and then later I see something ozzing out of the nuts and a yellowish design on the inside. Then the nuts drop from the tree. So when do I spray with this insecticide?

A. If I told you to apply Sevin insecticide I must have thought you had leaf footed plant bug in your almonds. My personal philosophy is to use pesticides as a last resort for insect control whenever possible. This would be the only reason I would recommend the use of a pesticide in almonds.

            You would apply it when you see the insect present on the leaves. This insect has overwintered in yours or your neighbors landscape plants. I have seen them overwinter in our climate in these locations. When leaves emerge, this insect will begin feeding and laying eggs.    The first thing you will see are herds of the immature called nymphs on the undersides of leaves. You might see some adults as well but the babies are much more numerous. You should start to see them around late April or early May so start looking then. When you see them, begin spraying immediately according to the label mixing rate. Wear protective clothing.

Putting Rock Mulch on Top of Composted Soil/Wood Mulch for Fruit Trees


Q. In my backyard in 2010 I planted a semi-dwarf Early Elberta Peach tree and a Katy Apricot.  I hand-watered them and left their tree wells uncovered until I completed the irrigation system around April 2011.  Now each tree has drip emitters. I put a thick layer of Dr. Q's Pay Dirt potting soil on top of each tree well and then covered the potting soil over with a layer of the ruby red stone that I have throughout the floor of my backyard.  Both trees are doing very well and I want to be sure to do everything I can for their long-term health.

            Per your View article, should I move the red stone back off the top of the tree wells to a radius of 6 feet away from each tree, and then cover each tree well with a layer of wood mulch instead?

 A. One soil problem we have when growing fruit trees in our desert is the small amount of organic matter in our soils. This miniscule amount of organic matter is not enough for nearly all plants including so-called desert plants.

            Fruit trees, and nearly all other plants, perform much better in our soils if organic matter (compost preferably) is added to the soil surrounding the roots. I hope that you added a lot of amendments to the soil at the time of planting, not just the surface.

            I have compared two application methods when compost is applied to fruit trees: mixing it only to the soil at the time of planting and adding it only to the soil surface after planting. Adding it to the soil, not just the soil surface, dramatically improves plant growth in our desert soils.

            The best soil amendments to use to use when increasing organic matter in our soils are homemade composts. Commercially made composts, available in bags or bulk and extremely variable in quality, would be next. The good ones (there are good ones out there now thanks to the explosion in organic gardening) are expensive. The cost of enough good quality compost, added to the hole at planting time, in some cases might rival the cost of the plant itself.

            If trees are planted in amended soils and then the soil surface covered with rock, over time, the organic matter in the soil is “used up” so to speak by soil microorganisms. When the majority has been used up, we say the soil has become “mineralized”. Without addition of organic matter to the soil surface every two to three years, the soil slowly reverts back to its previous desert condition.

            From my observations of fruit trees and nondesert landscape plants growing in our desert soils amended only at the time of planting and mulched with rock only, the soil is typically “mineralized” by the fourth or fifth years. Cacti and desert plants are much more tolerant of mineralized soils but still grow better in amended soils.

            By placing wood mulch on the soil surface where the soil is wet, it slowly decomposes. Through its decomposition it adds organic matter to the soil. Through their decomposition, mulches add a lot of organic activity such as beneficial microorganisms and earthworms leading to improved plant health. Rock mulch cannot add organic matter and so in a few years none of the benefits of organic mulches will be present.

            I am guessing your trees will be fine for several years with rock mulch covering the soil surface. But what may happen in the fourth through the sixth years, as the soil becomes mineralized, is that they may begin to decline in health.  The trees may become more and more yellow, leading to leaf scorch, followed by branch dieback and insect attacks such as borers.

            Borers come into play due to a decline in tree health. Decreased plant health causes a thinning of the tree canopy leading to an increased amount of sunburn damage to the limbs. Sunburn damaged areas are the ideal locations for borers damage to occur.

            My concern would be how you might add organic matter to the wet soil surfaces as it decomposes. If you can do this then it will probably not be a problem.  It is best for the trees if you can put wood mulch in the wetted area under the trees. In the drier areas under the tree the wood mulch will not decompose.

Lower Limbs of Fruit Trees Too High Off of the Ground


Q. I watched your videos on pruning your peach trees for a lateral orchard.  We planted some bare root plums and peach trees last Saturday. I want to do a lateral orchard but there are no branches down at knee level.  They are at about hip level.  Would I still cut the trunk off at knee level?  Would branches or buds form down lower if I did that or would it just kill my trees?


A. It should be a ladderless Orchard since what we are trying to accomplish is to keep the trees close enough to the ground that we don't have to use ladders for pruning or harvesting the fruit. I could see how listening to the word ladderless on a video might be heard as lateral.

            If a peach or plum has been in the ground for a while, I would not recommend cutting the trunk at knee height. You will run the risk of severely damaging or even killing the tree. It depends on the tree but with plum or peach it would be very risky to cut an older part of the tree to reestablish the scaffold limbs. Now, if your tree was an almond then you could cut larger diameter wood and it will regrow below the cut. 

            You will have to work with the tree structure that you have. Maybe you will not be able to keep it at 6 1/2 to 7 feet tall but you certainly could keep it under 10 feet tall and still have a sizable harvest. My videos are available on Youtube by searching for Extremehort. I will be posting some new ones next week.

Tuesday, March 13, 2012

Webinar on High Tunnels Free

Final registration call for our high tunnels webinar
03/21
Outfit your barn with galvanized equipment.
03/28
Increase yields while decreasing your carbon footprint.
04/05
Conserve water one drop at a time.
04/11
Which structure is best for your growing needs?

Visit FarmTek to register
http://www.farmtek.com/farm/supplies/ExternalPageView?pageKey=EXTERNAL_PAGE_2001

Monday, March 12, 2012

Leaving for Afghanistan

I have accepted a post with the University of California, Davis, as their Deputy Chief of Party for establishing and extension program in Balkh Province, Afghanistan. The program is funded by USDA and involves currently UC Davis (lead) as well as Purdue and Washington State University. I will be leaving some time in April, 2012. My blog and newsletters will continue with perhaps some interesting posts from my new location. My newspaper column will continue with submissions from me from over there as well. You can still reach me by my email addresses with questions. So stay tuned!

Afghanistan Agricultural Extension Project (AAEP)

This project is designed to assist Afghanistan s Ministry of Agriculture, Irrigation, and Livestock to deliver more effective, demand-driven extension services to producers and other rural clientele. Anticipated results of the project include a cadre of extension staff with the technical expertise and appropriate methodologies to effectively extend information and knowledge; increased public accessibility to, and use of, government extension services; development of extension training modules and educational materials based on high-priority needs; targeted agricultural universities, vocational high schools, and technical institutes with increased capacity to prepare future extension personnel; improved services for women working in the agricultural sector; and a pluralistic approach to extension that responds to farmers needs for research-based technologies, builds upon the innovations of Afghanistan farmers, and promotes coordination among the various entities providing extension-related services.

Drip Emitters Probably a Better Choice for Containers Than Drip Tubing


An assortment of drip emitters
Q. I recently purchased 4 large clay pots 18" deep and 21" wide at the top for my roses.  I would like to run a soaker hose up the bottom, circle around the top edge, (I might want to under-plant with flowers) and then take the hose back through the bottom and on to the next pot.  My partner believes that we should just put two drip emitters at the top of the plant.  Do you think that it is okay to under-plant with flowers or should we just mulch the top with shredded cedar?  Also, should we fill part of the pot with gravel before we fill with soil?


A. Regarding the pot, I have never been an advocate of putting gravel or crushed clay pots at the bottom of the container for drainage. It is best to use the same soil mix throughout the container as it will drain the more readily if the soil is consistent from top to bottom. Make sure the soil drains freely out the bottom hole of the container.

            I understand you are trying to run some sort of drip irrigation up the bottom of the container so it is not so unsightly. This is the right way to do it but I happen to agree with your partner that drip emitters are probably a better choice than using a soaker hose. These soaker hoses frequently get plugged.

            I would probably run smaller distribution tubing to the top of the container and put two or three drip emitters there from a larger mainline polyethylene pipe at the bottom. This should be enough to water the understory plants if you want.

            Regarding the shredded cedar mulch, wood mulch is always a better choice than bark mulch. Wood mulch adds a lot more to the soil as it decomposes. The problem with wood mulch is that it is not very pretty up close. The problem with cedar mulch is that while pretty, is does not decompose easily.

            I would probably recommend using an inch of wood mulch and then perhaps putting something on top of it to beautify it such as cedar mulch. Be very careful with wood mulches coming in contact with young woody plants. If this wood mulch stays wet and stays in contact with the bark of young woody plants, it can cause the trunk to rot at the soil level, a problem we call collar rot. I hope this helps.