Type your question here!

Friday, July 26, 2019

Successfully Grow Tomatoes in the Desert

Q. I raised tomatoes for about 7 years and this year was my best year. The tomatoes that work best for me are Early Girl, Champion and Celebrity. This year I got about 200 tomatoes from these three plants already, they are still coming, and they taste good too. The only thing I did differently this year is put a 1-inch layer of worm castings on top of the soil. Was it the weather or the worm castings that did it or both?

Worm castings is now a popular addition to raised beds for vegetable production.. Photograph complements of Viragrow, Inc. Las Vegas, Nevada.

A. This may sound like heresy but there is nothing special about the fruit when using worm castings versus any good compost or quality amendment added to the soil. Some may argue but the tomato plant doesn’t know the difference. The important thing is that soil improvement was done. 

But the overriding factor this year was probably the cool spring weather. Granted, you are managing your tomatoes better each year, the spring weather was cool for a long period of time, and you applied a good soil amendment and fertilizer in the form of worm castings.

I think this is what everyone wants to accomplish when growing tomatoes, a high quality tomato that tastes good. This tomato was grown in Balkh Province, Afghanistan, where temperatures can rival the Las Vegas area. If they can do it, you can do it.

            Repeat what you did next year and see if there is a difference in your production and the taste of your tomatoes. Hopefully, you took some good notes. I am guessing you will see a smaller number of fruit produced if the weather heats up in a hurry and there isn’t a long, cool spring like we had this year. And if you use a good soil amendment, like worm castings or a quality compost, the tomatoes should taste superb again.

The Zimbabwe "Worm Man" who was selling worm castings that he was producing. Although the plants don't know the difference, there is some scientific research that demonstrates some benefits to plants when using it.

            Tomatoes stop setting fruit when air temperatures stay consistently above 95F. The tomatoes that set earlier continue to grow and mature when it stays hot. That isn’t the problem, It’s the production of fruit that stops at high air temperatures. That’s when the entire plant stops making more fruit.

If you don't have much room a tomato plant can be grown in a nursery container. I would recommend using a 15 gallon nursery container. When you are finished with production, this composted soil can be added to the garden or landscape. It makes crop rotation easy. Just replace the soil and container! Photo courtesy Viragrow, Inc. North Las Vegas.

            If the air temperature drops below 95F for a couple of days, new flowers will again set fruit. They stop setting again once the air temperature returns above 95F. With air temperatures that fluctuate to the low nineties and then rise to the high nineties, tomato fruit production may be erratic.

Fertilize tomatoes with a start up fertilizer at the beginning and don't fertilize again until you start to see small fruits develop from the flowers.

             Some other varieties of tomatoes to try include cherry tomatoes like Sweet 100, Sun Gold and grape tomatoes as well as the yellow pear tomatoes. These plants are reliable, quickly produce fruit from flowers and can fill some gaps when temperatures fluctuate a lot.

Yellow parrot tomatoes, along with great tomatoes and cherry tomatoes are always successful in our climate. They don't require a lot of production time from flowering to finish. Throw in a couple of these tomato plants with your others to help fill in the voids in production.

            Also, choose tomatoes that are determinate in form rather than indeterminate. These tomatoes tend to produce larger numbers of fruit early in the season and don’t sprawl all over the garden.


            Include varieties like Better Boy or Big Boy and a Roma type like San Marzano for a “meatier” tomato. Move tomato plants to the other end of a raised bed rather than plant them in the same spot year after year. This helps reduce disease problems.


            High temperatures produce a sweeter tomato and lower temperatures keep the acidity higher. Good flavor needs a balance between sweetness and acidity. The variety and weather conditions produce these delicate flavors unless the soil is void of plant nutrients.  Small amounts of mineral fertilizers work well if the soil has organics, like worm castings, added to it.

Like this information? Visit my podcast and learn more! 

Watering Pine Trees – Water Deep!

Q. I recently moved into a condo that has pine trees on the property. Some of them look like they aren’t growing much but those still in grassy areas look much better. Some other pines have branches that are dying back. Do I need to supply water to these trees?

The very new growth in the spring of pine trees are called "candles" because they look like candles. All the new growth for that pine tree is contained in that candle. If water is available to the tree, candles will stretch and get big. If water is limited, the candles will not stretch and the new growth will stay small.Notice the buds at the base of the candle. I will talk about these buds in the next picture.
A. All of this is not simply a water issue. There is probably a disease problem going on as well. But first things first. Pine tree branch growth, and how dense the tree is, has a lot to do with how much water it receives in the spring and early summer months. Just as important is how deep the water drains in the soil, to encourage deep root growth, after it’s applied.

Branches of pine trees are in the whorls along the trunk. In the picture above, you can see the buds at the base of a candle. Those buds will grow into limbs that are in whorls around the trunk.

            Most native pine trees grow along canyons or stream banks where water is plentiful in the spring months and less available later in the season. Water availability coincides with spring growth which in turn increases the tree density.
            Water pine trees deeply, particularly in the spring months. How deep? Water should drain 24 to 36 inches into the soil each time it’s watered. To make sure it’s deep enough, measure this depth with a long thin metal rod like a piece of rebar. Plenty of water this time of year helps push new growth. This new growth supports the needles responsible for a dense tree canopy. Deep irrigations are important later in the year, but less often, to maintain this density.

This blow over can happen to trees when they receive shallow irrigations and shallow applications of water. This is a mesquite but it can happen to pine trees, and does. Water large trees deeply to avoid blow over during strong winds. With deep irrigations, roots will grow deeply.

            Lawn watering only applies water about eight or 10 inches deep. This is not deep enough for large pine trees as they get bigger. Watering lawns with shallow irrigation may keep the trees denser but it doesn’t encourage the deep roots needed during strong windstorms. Besides the lawn water, large pine trees should get periodic deep watering as well. Pine trees in lawns may look full but they usually will blow over during windstorms as they get bigger.
Aleppo Pine Blight is classified as a disease but there is no known pathogen or living disease agent associated with it. In extreme cases it can cause entire branches to die. But the tree with this problem should be and Aleppo Pine, not a different type of pine.

            Branch dieback of pine trees is usually a physiological disease that cannot be cured called Aleppo Pine Blight. In most cases, new pine needles in the spring replace the dead needles lost during the winter months.

When to Plant Pomegranate

Q. We are thinking of planting a pomegranate bush in our backyard. I suppose right now in the middle of summer is not a good time to plant. Would late September or early October be okay, or do we have to wait until Spring? Any other helpful hints on planting this type of bush?

Pomegranates grow well in hot, dry climates that have winter temperatures that don't fall below about 20° F (-7 C). Pomegranate can develop several disease problems that affect the quality of the fruit in humid climates. You start to see some winter damage to pomegranates starting around 20° F. Some varieties can handle colder temperatures in the winter than others.

A. Summer months, when it’s hot, is not the best time for planting anything except palm trees and Bermuda grass. Pomegranates will struggle after planting during the summer months. To attempt summer planting, you better have a very green thumb and lots of experience gardening in the desert.
Pomegranate flowers form on "current season wood". This means that the flowers form on the wood formed that year. This is why pomegranate doesn't start flowering until a little bit later in the season than peach or apricot trees. And pomegranates continue to flower through most of the summer.

            Wait until Fall, about mid Sept to mid Oct in southern Nevada. You will have more success during the Fall months and the plant will be happier. A disadvantage is that the selection of local plants is not as large as in the spring months. Probably the two most popular pomegranate varieties are the traditional Wonderful or the sweeter and soft seeded Utah Sweet variety. If you don’t see what you want, wait until spring.
The Ambrosia variety of pomegranate is one of the earliest varieties with it fully ripe and ready to pick in about September. Ambrosio generally forms fruit larger than this one.

The fruit inside, called arils, is about the same color as the outer skin or rind in Ambrosia. That might not be true in many varieties.
            If you must plant now, do it early in the morning and have the hole already dug and the soil used for planting amended with compost. Fill the hole with water the night before and let it drain overnight.
Maintain the old wood of pomegranate and the percentage of larger fruit will be higher. Some of the more popular varieties include Wonderful, Sweet, Eversweet, Grenada and Sharp's Velvet. A variety recently released in the United States called Parfianka is getting a lot of attention lately.

            When planting, soak the container in freshwater for about 30 minutes. Take it out of its container and immediately place it in the hole and start filling the hole with water. Add the amended soil to this slurry and let it flow around the plant roots.  Stake the plant to keep the roots from moving and water the entire planting hole thoroughly so it’s muddy. Water it again, just like that, the next day. Set the irrigation controller so that it waters not more often than every other day during the heat. 

Why Oleander Not Flowering

Q. I have a dozen, full-sized oleander plants I put in last year. I fertilized them with a 20 – 20 – 20 fertilizer. They are growing great but they rarely flower. Am I missing something or is it the fertilizer?
Flowers of a full sized oleander shrub. Flowers grow on "current seasons wood". In other words, the flowers form on stem growth this year, not last.

A. It will probably take about three years for them to really start flowering a lot with that fertilizer and regular irrigation. Oleander loves irrigation water. It also loves fertilizer. The combination of regularly watering and applying a good fertilizer results in dark green leaves with lots of new succulent growth. This new growth is not yet fully mature. When it does flower a little bit later in its life, the show will be spectacular. Just be patient.
If oleander is cut back hard, it will grow fast to reach close to its size before it was cut back. Some people call this its "root to shoot ratio". When the plant has an existing large bunch of roots and the top is removed, the sbrub grows very rapidly until it gets back close to its original size. It doesn't waste time and energy flowering yet. But it will when it gets larger.

            The nitrogen in the fertilizer is the first 20. The second and third 20s stand for the phosphorus and potassium in the fertilizer. The middle 20, the phosphorus, encourages flowering but it also encourages the roots to get firmly established in the soil. Flowers will be produced on new growth. The more stems of new growth, the more flowers it produces. If the oleander is lush and bushy, it will be full of flowers and bloom when it’s ready.


Dwarf oleanders stay small and flower at a smaller size than standard sized oleanders. When oleanders are young make sure there is plenty of phosphorus in the amended soil and then just feed it nitrogen fertilizer to get it big. This shrub will start flowering when it's supposed to.

Thursday, July 25, 2019

Soil Moisture Sensors are Not All the Same

My soil moisture measurements for the University orchard were important. I used manual tensiometers and the Watermark Soil Moisture sensor. For a fast and fairly accurate idea of how wet your soils were these inexpensive soil moisture sensors are not bad. They are not accurate enough for publishing in scientific journals but for knowing if time to irrigate, its not bad.

I have been mentioning quite often how to know when to apply water by using a soil moisture sensor. By sticking the probe in the soil near the middle of where the roots are located and taking a moisture sensor reading, you can roughly estimate the level of moisture in the soil. Here's how.

Chose a moisture sensor.
This is an inexpensive soil moisture sensor you can buy from Amazon, Lowes, Home Depot and any local nursery. Its less than $10 and made for soft soils that are easy to push into but with some care how you use them you can make them last a couple of years of occasional use.


This one had a recognizable name from their compost thermometers but this one didn't hold up in desert soils. The tip fell off after using it for three months.

This is what happened to the Reotemp Soil Moisture Sensor after three months of occasional use. Maybe ten times. Maybe I got a lemon.

2. Adjust the sensor.

The Lincoln and Reotemp both have an calibration screw on the backside. I stick the tip of the probe in a jar of water, let it get wet for about 30 seconds and adjust the meter so it reads "10". I need a very small tipped screwdriver, like one a jeweler uses, to make the adjustment. I do this every time I go out and take measurements.

Here I am inserting the tip of the probe into a glass of water, waiting about 30 seconds and then checking to make sure it reads "10". If not, which is often, I adjust the sensor to read 10 by turning the adjustment screw on the back until it reads "10". 

Some of the inexpensive plastic types may not have anything to calibrate. In cases like that, I make a note of what number it reads when the tip is inserted in the glass of water and make a mental adjustment to my measurements in the field.

3. I always take three measurements near the same spot. This is because the soil is not the same due to the variability of the soil in the field and rocks. I insert the tip of the meter into the soil, slowly, until it reaches about halfway of the depth of the roots of the plants. Sometimes I have to do this four or five times to get a good measurement due to rocks. For instance on new fruit trees the depth it is inserted is maybe only four or five inches. But I watch the needle move as the tip is inserted deeper. For established trees I will measure the soil moisture at about 6 to 8 inches. Average readings of about "5" tell me its time to irrigate.

4. I use rebar to tell me how deep the irrigation water is draining.

I use 3/16 inch rebar, four feet long, to tell me if I watered deep enough.
The irrigation depth of plants should be 8 inches for annual vegetables, lawns and annual flowers. For small shrubs and perennial vegetables like artichokes and asparagus it is 12 inches. For medium sized shrubs and small trees, 18 inches deep. Medium sized trees 24 inches deep. Large trees like many pines, 36 inches deep. by pushing on the rebar into wet soil it will be hard to push where the soil is not wet. For large trees you need a four foot long rebar.

To change the depth of irrigation on the same valve, change the size and number of emitters to the plants not getting enough water.

5. Irrigation water should be applied to AT LEAST half the area under the plant canopy. If the plant is three feet wide then four emitters placed 12 inches from the main stem is enough. If the spread of a tree is ten feet, then place a circle of four emitters 12 inches from the trunk and a second ring of emitters 18 inches beyond that. I doubt people will water the entire area under the canopy.

The area under theis tree needs more drip emitters and the emitters spaced closer to get enough water applied and to the right depth.
6. Mulch slows loss of soil water from evaporation and makes plant roots more competitive. Mulch will add one to two days extra between irrigations during summer months.

Apply woodchip mulch 3 to 4 inches deep to soils beneath plants that are not native to desert areas like these fruit trees. Rock mulch can be used 2 to 3 inches deep to cover soils beneath desert plants. But my experience is that even desert plants like woodchip mulch. 

Desert Horticulture Podcast: How to Irrigate Plants Growing in the Desert

Learn how to irrigate landscape plants, fruit trees, vegetables and your lawn in this episode of Desert Horticulture.


How to Water Plants in the Desert

The most critical plant management issue when growing plants in the desert is how much water is enough, when to apply it and where to apply it.

Drip emitters are watering but there are no plants! Water where plants are located and if they are removed, don't forget to stop the water.

Secondary to this issue is how well the soil surrounding the roots hold onto the water or release it when the plants need it. In short, how much water should the soil hold and how much should it let go? (drainage).

How Plants Use Water

Plant roots take water from the soil and send it to the leaves. As plants get bigger, they have more leaves so their need for water increases. Plant roots are always trying to find more water. They may not go looking for water but they can find out where it is! 

Roots don't respect property lines. If trees find water, they grow in the direction.

Plants always try to become bigger. This is why plant roots grow into new areas of the soil where there is water. These new sources of water are tapped into by the growing plant roots. These new sources of water become very important to the plant as it gets bigger. 
When soil fills with water, it drains. The water that drains from the soil leaves voids in the soil that fill with air.

The ideal landscape soil holds on about 50% of the applied water but if there's too much, the soil releases it so the roots can "breathe". This is called drainage. In the ideal landscape soil, about 50% of the applied water escapes the soil as drainage. The end result after drainage is complete is about half of the soil holds on to water while the other half has released it and these places are then occupied by air.

One gallon of applied water to dry soil = 1/2 gallon remains in the soil and 1/2 gallon drains.

An ideal soil has about 25% water and 25% air between its soil particles.

Two Ideas About Watering

 There are two methods floating around about how to water. 

Gas Tank Method. Some advocate filling the soil surrounding the roots with water and letting the plant "drink" from this pool of water until it needs more. Think of it like filling a gas tank on a car. The gas tank is filled and you drive around as much as you want but you refill the tank when it's about half empty. In irrigation lingo, many plants are watered again when about half of the water held by the soil is gone. It's different in cars. Gas tanks are filled with fuel when its about three fourths empty or more. Allowing plants to use three quarters or more of the water in the soil, like a fuel tank, would kill most plants except cacti!

One gallon of applied water to dry soil = 1/2 gallon remains in the soil and 1/2 gallon drains. One quart of this water is used while one quart remains in the soil.

Image result for gas tank half full

The Daily Sip Method. The second idea about how to water gives "sips" of water to plants every day. People who follow this idea give plants a drink of water every day. These drinks of water are more often in the summertime and less often in the wintertime. Also, these drinks of water are taken more often in the summer months than the winter months. This isn't like filling a gas tank at all. This is more like drinking a glass of water. In the summertime you drink water more often and in the wintertime you drink water less often.

Every day give plants a "sip" until the plant uses one quart.

Image result for sip of water

Pluses and Minuses of Both Ideas

Gas Tank Method. The first idea, "filling the gas tank" lets the plants "drink" from this supply of water any time it wants or needs to. The easiest water for the plant to get is the water closest to the surface of the soil. When water is plentiful in the soil, plants drink from it luxuriously and greedily. Unfortunately, the plant must compete with evaporation of this shallow water into the air. Both the plant and the air are "tugging" at the same shallow source of water.  
 
Water was applied to fast for the soil to hold all of it or the soil couldn't hold anymore.
When the gas tank drops to maybe three quarters full, the plant drinks from it a little bit more, cautiously. It taps into water that is a little deeper in the soil. It's harder for the plant to take water from the soil when the soil holds on to it more tightly. As the available water in the gas tank drops to 50%, the plant finds it even more difficult to get water and tries to find this water in still deeper soil. But the plant is still "happy".
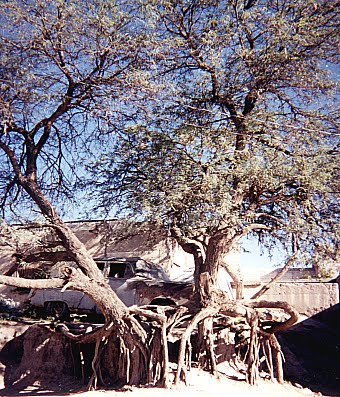
This mesquite tree is growing about 50 feet from a river. Its roots are growing deep because it of soil moisture from the river.

When this water supply in the soil, or gas tank, sinks to about 40% or less of the original amount, then that's when we begin seeing many plants starting to wilt during the hottest part of the day. This is our visual indicator that the plant can't get enough water for its leaves and newest stems. This can lead to permanent wilting; there just isn't enough water in the soil that the plants can find.
Mid day wilting of vegetables on a hot day. They will recover when it gets cooler but growth may be lost today.


A side note. Sometimes plant wilting is not because there isn't enough water available to the roots. It can happen when the air is so hot and dry that it's pulling the water from the leaves faster than the roots can find it. This can happen to vegetable transplants with tops growing too fast for their roots to send water to the leaves. It can also happen to newly planted fruit trees, shrubs and landscape trees. When this happens, it is called temporary wilting. As plant roots become established in the soil, temporary wilting may disappear.
Lettuce growing in plastic and straw mulch in Kosovo.

Another side note. Can you see the value of a surface mulch? Mulch is something applied to the surface of the soil that slows down the loss of water from the surface to the air, i.e., evaporation. When surface mulch is applied such as woodchips, rock or even plastic, evaporation slows down tremendously, improving the odds that plant roots will outcompete for the same water.
 
Plants growing in desert soils may grow better if woodchip mulch is used instead of bare soil or rock mulch.
The Daily Sip Method. The second idea, where daily sips of water are given to plants, requires regular, and sometimes daily inspections of plants. To do a good job using this idea, you should be very familiar with how much water different plants need. Otherwise plants receiving the smallest sips of water will dictate when to apply water to other plants. When these underwatered plants show signs they are not receiving enough water, they force us to apply water to all the plants receiving water at the same time as they do. 

This type of watering can be very wasteful and result in those plants, already receiving enough water, to get more. Hand watering plants not receiving enough water, instead of using the irrigation system, can reduce landscape water use and your water bill. But its time consuming.

A side note. Another drawback to this idea of watering is the encouragement in the growth of shallow roots on plants. Not terribly important with small plants, but when irrigating large trees this type of watering encourages plant roots to grow near the surface of the soil. A major reason for deep roots of trees is to prevent them from blowing over during strong winds. This type of watering encourages shallow roots to form on large trees. The formation of  "sip watering" and the formation of shallow roots leads to the blowing over of large trees.

This mesquite tree, (roots can grow to 200 feet deep!) blew over because it was irrigated with flowers and a lawn which makes shallow roots.


What's the solution?

1. Use the "gas tank method" when watering plants. The size of "gas tanks" depend on the size of plants irrigated. Vegetables, lawns and annual flowers require watering to a depth of 8 to 10 inches. Small and medium-sized shrubs and perennial vegetables should be watered 12 – 18 inches deep. Small and medium-sized trees should be watered 18 – 24 inches deep. Very large trees should have water applied 36 inches deep.

2. Use a soil moisture meter for knowing when to water again. Inexpensive houseplant moisture meters can be used for annual and perennial vegetables, lawns, annual flowers, small shrubs and perhaps even small trees and fruit trees. For larger plants, purchase and use a more expensive soil moisture meter. Measuring the moisture in the soil near the plant roots can give you an idea when the "gas tank" is approaching 50% full and it's time to water.

Moisture meters can be under $10 and others less than $100. For a few uses and shallow depths, choose the $10 version and be preparted for it to be thrown away after a time. They all have a gauge reading from 0 to 10, Dry to Wet.

3. Use a thin metal rod, like a 4 foot long piece of rebar, to determine how many minutes are required for an irrigation to deliver enough water to fill the gas tank. This metal rod can also be used to determine the size of the drip emitters (gallons per hour) needed to deliver that amount of water.
 A stick of rebar can be used for judging how deep water is draining.

4. Water the area under the plant to at least half the area under its canopy. For small plants this might mean using two emitters, medium shrubs four to six emitters, small trees and large shrubs 10 to 12 emitters and so on.
Water the soil under the canopy to AT LEAST half the area under it. This is not enough.

5. Apply mulch to the surface of the soil. For desert plants, rock mulch can be used. For non desert plants consider using woodchips. Vegetables will benefit from plastic mulch to warm the soil and keep it moist.


Rock mulch conserves moisture too. It just doesn't add anything back to the soil like woodchips can.
Did you like this information? Visit my podcast on this subject and learn more!

Wednesday, July 24, 2019

Desert Horticulture Podcast: Growing Tomatoes in the Desert

Join me in this special podcast on growing tomatoes in the desert if you ever wanted to try or just moved to the desert.

Growing Tomatoes if You Always Fail

Tomatoes are tricky in Las Vegas, but they typically don’t die suddenly, to get them to produce well. The idea of KISS (Keep It Simple Stupid) is always a good plan when doing something for the first time or when you move to the desert from a wetter place.
That's the end result we all want...big, home grown tomatoes. These were tomatoes grown near Mazari Sharif, Afghanistan. If they can do it, YOU can do it.

KISS steps for tomato growing:
  • Plant in early spring, Feb 15 or later depending on the weather and weather forecasts for the next two weeks. Local tomato transplants are usually okay. Sometimes you can plant early and get away with it and sometimes not. If planting late, pick cherry, grape or yellow pear types. Always use a "determinate" tomato until you want to experiment.
Start with 15 gal nursery container and fill it with potting soil for your first tomatoes. Dont use a smaller container than 15 gal. 

  • Select varieties that are known good producers; Champion, Early Girl, Patio, Jet Star, Roma for full sized tomato fruit. For smaller fruit choose cherry tomatoes such as Sweet 100 or grape tomatoes or yellow pear. They are very reliable. Select transplants that are about 6 to 8 inches tall and healthy. Avoid large transplants.
Select small transplants for the container. These transplants have a surface mulch of pine animal bedding around them to keep the soil most but you wont have to have it if planting in the cool spring months.

  • Pick a soil mix and not potting soil, compost, or something similar. It should be somewhat heavy and not light weight. Maybe in a couple years you can play around with different soil mixes but not at first.
I am holding Viragrow's Premium Garden Soil Mix. It is mixed about 1/3 compost and 2/3 sand plus some seaweed extract, rock dust and some other goodies. You dont have to use something this full of stuff but having the soil heavy and well drained helps establish transplants and is forgiving if you are not sure of your desert irrigation talents yet.

  • Try planting in new, 15 gallon containers first before going to a raised bed until you get the knack of it. Use an established soil mix known for growing tomatoes in the desert in the past for vegetables. Fill the container from the bag and then water it thoroughly so that the soil settles leaving a 1 inch headspace at the top. Locate them on the east side of a wall or building.

This is a five gallon plastic nursery container and it will work but the 15 gallon container is more "forgiving". It holds more soil so it doesn't run out of water as soon and doesn't heat up as fast.

  • This next part is a bit tricky. If the soil mix did not have any fertilizer in it, then water with a starter fertilizer mixed in the water used for watering. This can be a small bucket or can.
This is a water soluble fertilizer that can be dissolved in water and watered in the soil just after you plant. Its nitrogen content (the 15 on the left) is lower than the middle number (30) which is phosphorus. When planting transplants or seed it is important to have more phosphorus available to the plants than nitrogen. This helps get their roots off to a good start. The 15 on the right, potassium, is ALWAYS a good idea to have in a fertilizer. ALWAYS.

Fertilizers used for getting transplants and seeds off to a good start are fertilizers like this Arizonas Best Starter Fertilizer. It is a granular fertilizer that is mixed with the soil before planting.
  • Plant in this soil when it is moist. The first time you water, use water with a starter fertilizer in it. Use a clean digging device like a garden trowel. Remove the transplant from its container even if it’s a peat pot. If an expandable peat pellet was used with that netting on the outside, slice or cut the netting in several places until it nearly falls apart. Do this even if they tell you, you don’t have to. Plant it at the same depth it was in its old container into its new container and water it in until water comes out the bottom of the container. If there is no container, water it in until its muddy. Do this two more times in the next 24 hours.
  • Buy a soil moisture meter used for houseplants. It should cost less than $10. Stick the end in the soil about one inch and water next time when it reads 5. Use that soil moisture meter to tell you when to water until you feel the watering rhythm. If you aren’t sure if its time to water, use the soil moisture meter to tell you.
Soil moisture sensors like this one intended for houseplants will work in our soils but dont last very long. They fall apart after a few times.

  • If you applied a fertilizer when you planted the transplant, don’t apply any fertilizer until you see small fruit that formed from the flowers. Then start applying fertilizer, lightly, once a month.
Tomato fruit setting (right) and the flower open and ready for pollination (left).