Type your question here!

Saturday, September 28, 2019

Pruning Determinate Tomatoes in the Fall

Q. I know Roma tomato plants are determinate in their growth but if I keep them healthy will they set a fall crop for me?

A. All I can tell you is what I think will happen if it is a determinate tomato and how to prune it for fall production. There are a lot of unknowns involved but this should give you the best chance.

Roma Confusion

            Roma tomatoes are a certain type of tomato good for making tomato paste because they dont have a lot of water inside the fruit. So sometimes Romas are mixed with paste tomatoes and plum tomatoes and called paste types. Yes, Roma is determinate but paste types are predominantly indeterminate. So check what you got.

Determinate Vs Indeterminate

Determinate tomatoes are plants that are bush-like and produce fruit over a short time so it’s easier to pick. Indeterminate tomato plants grow as tomato “vines” and produce fruit spread out along these vines over a longer time. So-called Roma tomatoes are considered paste or plum tomatoes and many of these types can be either determinate or indeterminate. It’s good to know which you are buying for proper spacing and management.

Fall Pruning

            All plants need new growth to set flowers and fruit. For Fall production we want to stimulate new growth when air temperatures are entering the mid 90s. While indeterminate tomatoes can be cut back a lot in the Fall because they are so long, determinate types are cut back less due to their smaller plant size. Prune the plant back enough to provide for new growth but not enough to open the plant canopy for sunburn. Follow this pruning with water and fertilizer.

Friday, September 27, 2019

Sunburn, Insect Damage and Pruning Desert Museum Palo Verde

Q. I had my yard re-landscaped in June and with it I planted a Desert Museum Palo Verde. After planting, I pruned it and maybe removed too much which caused some sun damage. My great aunt used a lime and water "paint" on her trees to repel critters and I’m wondering if this might help.


A. The time of year it was planted probably had something to do with the damage you’re seeing. The lime and water paint was used in the past mostly to reduce sunburn from intense sunlight. The reduced damage from painting the trunk and limbs attracted fewer insect problems.

Fruit trees with trunks painted in Afghanistan. This was probably done by someone from an NGO and not done by locals for insect  and sunburn control in Balkh Province.
lime and water concoction

           
But painting trees with this concoction was also used to make them look prettier. It’s still done for ornamental purposes in some countries. Now we paint the trunk and larger limbs of fruit trees with dilute white latex paint mostly to reduce damage from boring insects attracted by injury from intense sunlight. That’s its primary purpose.

Plant at the Right Time of Year

            First off, planting trees and shrubs in the spring or fall months leads to more success and less damage than planting during the summer months. Palo Verde, like most landscape plants, should be planted in late January or February or late September and October for best success. Those spring and fall months are more forgiving than planting during the heat of the summer.

Transplant Shock

            Secondly transplant shock, or the “interruption in growth” of plants when moved from a container into the landscape, is more dramatic during the heat of the summer than during the cool spring and fall months. Transplant shock that time of year varies from almost nonexistent to severe branch dieback depending on the care given when planted.

Dig the hole and planting depth

            Dig the planting hole three times the diameter of the container and make sure plants go into a wet planting hole as quickly and carefully as possible. Never plant into a dry hole even if you add water immediately after planting. Damage from planting that time of year during the summer in coastal California might be minor but not in the Mojave Desert.
            Make sure plants are planted at container depth and, after planting, have not sunk deeply into soft, wet soil. This can be difficult to detect after planting and is a major cause for plants that struggle and eventually die after planting.

Water Deep and Not Often

            Water this tree under the canopy with enough water to wet roots 24 inches deep. Irrigate again to keep the soil moist at this depth, but not wet. Irrigating frequently and deep enough to keep soils moist will cause your tree to stay full, grow quickly and recover from sun damage. When it gets larger, reduce how often the tree is watered but not the volume of water applied.

Papaya Seed for Sprouts


Q. There are lots of black seeds when you cut open a papaya fruit. Can the green sprouts from these seeds be eaten and added to a salad? I don't want to grow a tall papaya tree in my condo.


A. Since the fruit produced by this tree is not important to you, the seeds can be collected, germinated and used for “sprouts”. Not many people are using these seeds for sprouting because the white latex sap of many plants is oftentimes a warning sign parts of it may be poisonous.


Im on our farm in the Philippines now so I went out and nicked this young papaya with my fingernail so you could see the latex

            Papaya sap contains a white latex thought to be important in reducing its pest problems. This sap however is used in pharmaceuticals and meat tenderizers because it contains an enzyme called papain. 

The same papain is used to speed up skin and muscle repair from sports injuries like cuts and abrasions, “leaky gut” syndrome, and implicated as useful in treatment of shingles, hay fever and minor aches and pains. Not much is known about eating papaya sprouts. Much more is known about the papain derived from the fruit or leaves.

Its also known in local folklore to reduce sex drive. Maybe that's why its nicknamed the fruit of priests. Back in 1993 when I first went to the Philippines the locals in small villages on Palawan were pleased to see me eat alot of it and I didn't know why. I was single at the time.


Good Fescue Grass Seed for the Desert

Q. Can you recommend a good fescue grass seed for starting a lawn? I did not have great success with a local brand that said it was made for our desert climate.  

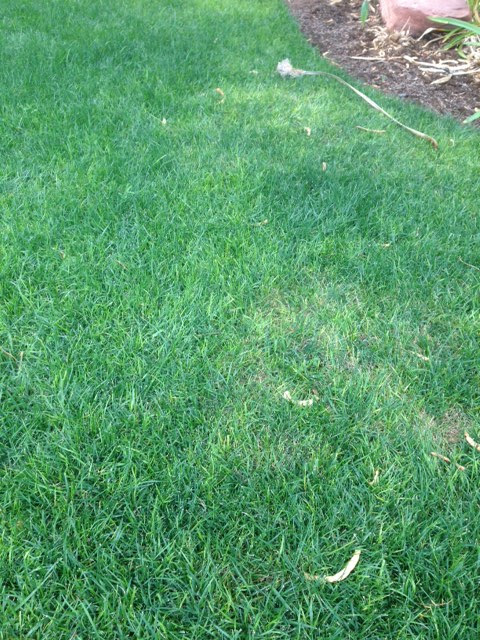
A. Most of the lawns planted in our desert climate are a blend of at least three different kinds of tall fescue. This can be read on the grass seed label. Personally, I would stay away from grass seed mixtures that contain annual rye grass, bluegrass or perennial ryegrass combined with tall fescue.
This is NOT a good tall fescue grass seed for home lawns. Great for parks but not home lawns due to its coarse texture. K31 or Kentucky 31 is a great highway grass...looks good at 50 mph

           
With grass seed, you get what you pay for. Most of the best grass seed blends are also the most expensive. Read the label. Buy grass seed that has at least three different types of tall fescue listed on the label. Stay away from K 31 a.k.a. Kentucky 31 tall fescue grass seed for home lawns. It’s great for parks and it’s cheap but mostly because it is durable and can handle our heat.

a hot cup of coffee is really hot and will damage grass but continual hot temps in hot climates can also be damaging. Las Vegas is in the transition zone for grass...grows all grasses poorly.

            Make sure the problem you had did not result from how it was planted or the irrigation system. Check the irrigation system before you plant and make sure it’s operating properly. The water from the sprinklers should be thrown far enough so that it reaches neighboring sprinkler heads. This is called “head-to-head coverage”.
            A seedbed needs to be prepared for grass seed at least 8 inches deep. This soil should be “firmed” enough so that when you walk on it your shoes don’t sink more than half an inch into the prepared and firmed soil. Proper soil preparation, not too hard and not too soft, is where most people fail.
            A starter fertilizer and grass seed mixture is applied to the surface of the soil with the grass seed applied at a rate of 10 to 12 pounds per thousand square feet of lawn area. Apply a very fine mulch on top of the seed no more than 1/8 inch deep. This can be steer manure or fine compost.
            Water long enough until water begins to “puddle” in areas. This tells you the maximum number of minutes you can irrigate until seed starts showing. Water twice a day at this stage; once a day when you start seeing grass. Increase the amount of minutes and decrease the frequency of application until you find that “sweet spot” to you are growing grass roots as deeply as you can.

Thursday, September 26, 2019

Guidance for Pruning Fruit Trees

Q. I need guidance on when and how to prune my fruit trees that are 3 to 5 years old. All of them have been producing fruit in the last couple of years. This includes an orange and a Meyer lemon along with a Blenheim apricot and a dwarf peach tree. All I have done in the past is basically ‘shape’ the trees; keep the height manageable and remove dead branches. 

A. Look for my Classes

I have fruit tree pruning classes posted for next January on Eventbrite. Consider signing up for one of these offered on a Saturday morning for some hands-on training with real fruit trees. These classes can answer specific questions you might have.

Lite Pruning Anytime

            Light pruning with a hand shears, removing wood that is less than half inch in diameter, can be done anytime of the year as long as it’s not overdone and opens the canopy too much. Pruning out too much allows for sunburn and borer problems to get hold in the trees. Make sure your hand shears are sharp and sanitized before you start cutting away.
            Major pruning is done from December to January, the winter months, in all deciduous fruit trees, waiting until leaf drop. With citrus, however, very little pruning is needed after you establish its structure early in its life. But when pruning is done, it’s performed soon after the fruit is harvested.

Control height

This is done to make it easier to pick and spray the trees when there are pest problems. The maximum height should similar to distances between trees. Having trees too close together, which creates crowding when they get older, forces fruit production towards the top of the trees.

Start on your knees

I find it easier to prune fruit trees working from the bottom and progressing towards the top. Remove entire limbs from the trunk to about knee height. The lowest limbs should support fruit easily harvested but the lowest fruit should not touch the ground when it’s ready to harvest.
            Remove most of the wood by pruning from the trunk and major limbs. Most pruning cuts remove entire branches. These are called “thinning cuts”. It orients major limbs so they emerge from the tree in different directions like spokes on a wheel. Most growth growing straight up or straight down should be removed. It’s not productive.

Fixing Crossed Branches, Broken Branches

            Once the overall structure of citrus trees is established, very little pruning is done. Focus on removing a branch that crosses another, sucker growth from the base of the tree and limbs that “shoot for the sky” and eliminate a branch interfering with another.
            Once the form of an apricot tree is established, only about 10% of its new growth is removed each year. I have had apricot trees that required no pruning. Much of that depends on the variety and its rootstock. Control its height if it’s too tall and get rid of any strong growth going up or down.

Genetic Dwarf Peach

            True genetic dwarf peach is pruned differently than a “normal” peach. Usually controlling height is not a problem. If the tree is overgrown, it’s canopy is thinned out so that speckled sunlight can penetrate to the interior.
            Fruit production comes from flowers growing on shorter shoots at the ends of branches. This is where most of the light pruning takes place. Most short shoots that contain the flowers are removed leaving behind only one or two of these short shoots.            

Holly and Caroline Cherry Burning Up as a Screen in Full Sun

Q. I planted hollies and Carolina cherry as an evergreen visual screen between our house and our neighbor’s house. The hollies burnt to a crisp and the Carolina cherries look bad. I need evergreens that can withstand full sun all day and give me privacy. Does something like this exist?

Carolina cherry laurel with yellowing leaves when planted in full sun and in our desert soils


A. Both of these plants will grow in our climate but not in the locations and perform in our desert the way you want or for that purpose. They are not desert plants. They can handle our desert soils and climate but they must be planted in protected locations with relief from afternoon sun to thrive. That’s why they are burning up.

Carolina cherry laurel planted in rock mulch starting to yellow. If it is planted well it will take about five years before this happens in our soils and extremes.

            A privacy hedge should be evergreen and retain leaves through the winter. If it’s a warm winter, they may stay evergreen. Some evergreen plants drop their leaves in the winter and become deciduous if it gets too cold. Colder temperatures than this, they will freeze back. Accepting this should get you through most winters here without being too upset.
            Do your homework on these and shop around because not all of these will be available from local nurseries. Non-desert plants should be watered more often than true desert plants. This means they should be on the same valve as other non-desert plants.
            Some of the best reviews of these plants are from Arizona State University in the Phoenix area but Phoenix has warmer temperatures than we do. So be careful of winter freezing temperatures. In the Las Vegas Valley, aim for winter temperatures in the low 20s for long-term sustainability and expect that they may not be evergreen or may have some dieback during very cold winters.
            Here are some true desert plants you might consider for that purpose. They can handle full sun in harsh locations. They are true desert plants originating from our Southwestern deserts and include hopseed bush, Arizona rosewood, creosote bush, jojoba, yellow bells, and little leaf cordia. Even though they are desert plants, I would still amend the soil with a decent compost at the time of planting and plant them wet. Just because they are desert plants doesn’t mean they don’t like a little TLC.
            Don’t forget standard oleander. It’s not a desert plant but can handle extreme desert conditions like ours. This means they should be on the same irrigation valve with other non-desert plants.

Recently Planted African Sumac Leaf Curl

Q. I recently found your blog and wonder if you have any advice for me about an African Sumac that we planted last October. It did beautifully through the winter. About a month ago, I started noticing some leaves curling up, but staying green. Now the lower branches are drooping and over half of the leaves have curled, but stayed green. Rot? Fungus?

I did one treatment of ferti-lome around the base last week. No change.

A. Watering too often and not watering enough can give the same results so I can see how it could be either way. The only way to know for sure is know how wet the soil is when you water again and how much water you are applying.

When you water African sumac, water it with lots of water over a large area under the tree canopy and don’t water again until it is about half gone. One of the problems with tree installations by the contractors who plant for Moon Valley I have been told in the past is the size of the hole they dig for the tree and lack of amendment added to the soil when planting. This could be part of the problem for you as well.

The hole provided for the tree  should be at least three times the size of the container. If this was a 24 inch box tree then it will be a big hole that is dug. The hole does not have to be deeper than the container but three times its width. I don’t know how much amendment was added but it should be about the same volume as the soil taken from the hole.

What can you do now? Remember this in the future but there is not much you can do to a tree that was already planted. I tell people who buy trees to be planted by a contractor from Moon Valley is to pay them extra cash and have them dig the hole wider.

 Buy your own amendment like Viragrow’s compost and provide it for them instead of the bags they bring. Water the tree in the hole AS it is being planted and flood the area planted three times, once a day. Then turn it over to the drip or irrigation system but do not water daily. Provide enough water each time you irrigate to get it down to 18 inches deep.

Water the area under the canopy of the tree at least half its width. All its width is better. Use a four foot long stick of rebar to determine this by pushing it in the soil until it is difficult to push. Water again when the soil in the upper four inches is starting to dry out.

You can use a $10 moisture meter to determine this.


Water when it reads “5-6” in three locations under the tree canopy where you watered.

How and Why to Take a Leaf Tissue Nutrient Sample

A leaf tissue analysis would show that this ornamental pear is lacking iron.

Why Send a Tissue Analysis?

The purpose of submitting leaves for a leaf tissue nutrient analysis is to find out the reasons why plants might look sickly or not performing the way we would like. These types of leaf tissue analysis identify nutrients found in the leaves and help to identify which ones may be in short supply. These types of tools are used by growers to adjust which fertilizers are applied and their timing of application in efforts to boost production or performance.


A leaf tissue analysis would show this peach tree is iron deficient

What the Sample Wont Tell You

Submitting a leaf tissue sample has nothing to do with identifying an insect or disease problem, chemical poisoning problems from weed killers or other toxic chemicals. These types of problems are best handled a different way.

Baseline Sample is Needed

Submitting leaf samples from a problem plant are not enough. Leaf nutrient analysis information is needed from acceptable plants (this establishes a baseline) as well as the problem plant. It's best these plants are genetically close to each other (the same variety or cultivar is best), they are approximately the same age, the leaf samples taken from the same locations and similar times of year. 

even though it looks like it might be nutritional, its not. Leaf tissue analysis wont show a disease problem developing like this

Sometimes two samples are submitted; one from acceptable plants and another from problem plants. When historical information exists, this information can be used as the baseline for submitting leaf tissue from problem plants so always keep old leaf tissue analysis reports!

How to Take a Sample

Select a plant or group of plants showing a suspected nutritional problem.  The plants may all be in the same area or they may be scattered through the growing area. If this problem is on only one plant, sample a single plant. If the problem is on several plants, take subsamples from several plants showing the same symptoms and combine them into one sample.  

Take leaf samples at a time of year used to establish historical baseline information. For example, if the baseline information you are using were from plants sampled in the spring of the year, take samples in the spring. If baseline information was in Midsummer, take samples in Midsummer. In some cases, a new baseline may be needed. If submitting one sample from problem plants and another from acceptable plants to establish a baseline, then these are taken on the same date.

Take leaf samples from similar areas of the plant and establish where on the plant samples should be taken from. In some cases, this might be newer growth and in other cases older growth. A simple way to do this is to take leaf samples at similar distances along the stems.

Document and Label

Label these samples in a clean plastic bag using a permanent marker with a 4 letter Code name, date they were taken, and area of the plant taken from (old growth vs new growth). Place these leaf samples in a refrigerator until they are ready to be sent to the lab for analysis.

Take notes. Write what you did and how you did it in a log or notebook. Believe me, you wont remember it next year.

Contact the Laboratory

Download submission forms from the laboratories website and fill out the paperwork.  Call the laboratory and make arrangements for the shipment and any fees that must be paid ahead of time. It is important that these samples are as fresh as possible so keep them in the refrigerator until they are ready to be sent, overnight, to the laboratory. Send them to a laboratory at the beginning of the week so they're as fresh as possible.

A plant tissue analysis laboratory that I frequently use is A and L Laboratories in Modesto CA with the website http://www.al-labs-west.com/