Type your question here!

Saturday, June 15, 2013

Separating the Worms from Worm Castings or Vermicompost


Q. How do I separate the worms from my compost? I bought a thousand worms from a worm farm online. They have multiplied into the zillions but I don’t want to give them to my neighbors when I give away the compost. Is there an easy way to separate worms from compost?
 

A. I am not sure how you are vermicomposting but if your compost with the worms is deep enough, the worms will be mostly in the top 4 to 6 inches of the compost. The casting should be at the bottom.


I had a chance to meet the vermiculture king in Zimbabwe, Eric 'WormMan' Harrison, on a trip to Zimbabwe. His book on farming in Zimbabwe before the Mugabe regime, JAMBANJA The true life story of a Zimbabwean farmer  is worth reading. A true pioneering farmer in Zimbabwe's history. He also authored a book on vermiculture. He passed on March 26, 2012.
 http://www.cfuzim.org/index.php?option=com_content&view=article&id=2337:tribute-to-eric-harrison&catid=76:cfu-press-releases&Itemid=97
            So by scraping off the top layer and returning it to new compost for vermicomposting you should retrieve most of them. Also, if you can screen the compost with 1/4 inch wire mesh this should get the remainder.

            . If some of the compost does not fit through the wire mesh return this also to your vermicomposting bin for further processing. You will give some "starts" away. That is inevitable. You will recover most of them

            Worms like to feed on compost rather than kitchen scraps so vermicomposting can be a two-step process; first compost and then transfer the compost to the vermicomposting bin for further refining.

When Do I Fertilize My Lawn and With What?


Q. What are the magic dates for fertilizing fescue and bermuda lawns that you had in the 9/30/2012 column?

A. The magic dates, easy to remember, for fescue is Labor Day, Memorial Day and Thanksgiving, the last one for keeping it green through the low temperatures of winter.

For Bermudagrass it is Labor Day, Memorial Day and Fourth of July. Use a slow release high nitrogen fertilizer made for lawns and mow with a recycling mower... one that mulches the clippings back into the lawn.

The best ratio of nitrogen to phophorus to potassium (the big NPK numbers on the bag) is approximately 3:1:2 or 4:1:2 or higher in potassium (the last number like even a 4:1:4). They do  not need to be a perfect ratio but close. The number should be HIGH:Low:Medium to High. What you DONT want to use a fertilizer high in phosphorus, the middle number.

Examples include 21:7:14; 12-4-8; 16-6-12; 15-5-15; etc.

the best type of  nitrogen is slow release nitrogen such as sulfur coated urea, ureaform, etc. At least half of the bag's nitrogen should be slow release. The best fertilizers I have used on turfgrass have been composted manures or vericompost. But they are expensive.

Good luck!

Pruning an Olive Tree With Two Leaders


Q. I have a non-fruiting Wilson Olive tree that was planted  last fall. It is approximately 5 ½ feet tall. I would like to prune it to be less like a bush and more like a tree with one trunk and a canopy. Since it is non-fruiting, I am not interested in pruning for better olive production and all advice on the internet seems geared toward that.

I have attached some photos of the tree. Here are some questions:

1) There are two main leaders growing up in the center. I would prefer one but am afraid if I take one out it will cause a big hole in the canopy. If I removed one leader would it eventually fill back in? I understand that olive trees are fairly slow growing so I am afraid the tree would look unsightly for quite some time.
2) There are smaller branches trying to grow horizontally from one of the leaders but the other leader is in the way.
3) Since the upright leaders are already touching, what will happen if I leave both of them as is?
4) Some of the leaves have brown tips-was this just from transplanting? Not enough water?

Would appreciate any advice you could give. Thank you.

(To the readers of this blog I apologize. I accidentally eliminated the photo from this reader. But the tree did have two leaders growing from the same area and  nearly the same size. The tree was already fairly large. Each occupied about half of the tree canopy. When trees  have two leaders in the center ,co-leaders, they both fight for the same light and usually have very weak attachments to the trunk due to what we call "narrow crotch angles.. As the tree gets older, these places where they attach to the trunk can become weak and one, usually the smaller of the two, will split from the trunk. If this is a large limb then this might create damages sto property. Regardless, if it splits when it is large it will definitely leave an ugly tree! My reasoning in this answer was that the tree did not have a heavy fruit load to support so that was not an issue. If two leaders are to be maintained as the tree gets larger and limbs become heavier, it is best to drill a hole through both co-leaders and put a threaded, stainless steel bar through both and secure with washers and nuts. Make sure it is clearly obvious as the tree gets older. You do not want someone with a chainsaw discovering a large, hidden steel bolt!)

A. I really don’t think it’s that bad. I would leave both leaders. You are right, it will leave a big hole and it will be unsightly for years to come. All your pruning cuts will be to eliminate branches so remove them at the source. Do not just cut limbs back. Remove branches at a crotch. All you have to do is remove crossed and broken branches. If two are crossed, remove the one which is more offensive. If you have new growth growing straight up, remove it at its point of origin. If there are limbs in the center interfering with each other, remove one or both if you have to. Do not leave stubs.

The brown leaf tips are from a lack of water. The tree is drought tolerant but will be nicer looking with more water. I would give it about 25 to 30 gallons each time you water. Water once a week now, deeply. In midsummer go to twice a week. In winter, once every two weeks or so. Fertilize the tree now by spreading some lawn fertilizer at the base and water it in with a few gallons. Spread the fertilizer under the canopy like you were salting a steak but the guy salting it uses way too much salt and has hypertension.

I hope this helps.

What Can I Plant if I Have Nematodes?

Thanks for keeping up with the blog. I LOVE it and always rely on it every time I need advice. You awesome! I do have a question for you and I'd really love your input.
 
Q. You have covered on one of your post about nematodes. Last fall, I pulled one of my cucumber plants. There were 4 plants in a row. One of the plants definitely had strange roots which I am almost positive were caused by root knot nematodes. I didn't do any solarization because it was cold during the time and I have read that it is best to do it during the hottest months. Are these nematodes harmful to humans and my dog? Will it give me a disease or a worm if I touched the soil?

You have covered that the only other way to fix this completely is through fumigation--which I can't really do since I only do organic gardening. Can I at least plant any other vegetables in the same raised bed, or will it cause me any ill effects after I eat the fruit/veggies that it bears? I was also thinking of maybe removing the soil from the raised bed and move them to the big pots where I will be planting citrus plants. Then I will replace the raised bed with new soil. Would this work well or will it just cause problems to my citrus plants? I'd love your input.

THANK YOU SO MUCH, Bob! I appreciate your the you are taking to read this.


A. Nematodes are very tough to impossible to get rid of if you have them. I should say they are basically impossible to get rid of. Be careful and do not move soil from this spot to other areas or you will move the nematodes as well.
Root knot nematode on tomato
 
Nematodes only infest plants, not animals so all animals are safe around these guys. Soil solarization will help knock back the populations but not get rid of them. There are some products like Clandosan (a naturalproduct) which are supposed to help but I would not be too optimistic. Even with fumigation it does not get rid of them buy just knocks them back.

Root knot nematode on mulberry roots
Use vegetables that are nematode resistant and fruit trees on rootstocks that resist nematodes. On vegetables they will have the designation "N" below the name somewhere. Other letters might also appear like "V" "F" and the like which just stands for resistant to other pest problems like verticillium (V) and Fusarium (F), two prominent disease problems. Nematode resistant rootstocks for fruit trees include Nemaguard, Citation, Viking, Atlas, Myrobalan, and Marianna. Hope this helps.

Removing Thatch from Bermudagrass and Poa Invasion


Q. I cant get my bermudagrass to look good, like the golf courses do. I think one of my problems has be mowing too low, believing it would still green up if I did that. I dont overseed it for a winter lawn. I just let it turn brown. Over the last two weeks I've raised the height and fertilized. Looking much better, but probably need another week for it all to get up to the same height. I'm getting small patches of darker green wider leafs, presumably poa.  Probably little I can do to stop the poa.
 

A. Depending on the bermudagrass it could be mowed up to one inch tall. However most bermudagrass would like to be at about 1/2 inch in height. Lower than this is for the professionals in my opinion and requires very frequent mowing to look good. The lower you mow, the more often  you have to mow to look good. When you have a thatch problem, mowing low will make it look worse. You really have to address the thatch problem this fall.

If you don't overseed, the best time to do it would be in late summer (August) so that the grass has time to mend before winter sets in. After dethatching, fertilize and water heavily to speed up the repair process.
Poa will leave dark green spots when it invades bermudagrass like it has in the right side of this picture. It grows more
upright than bermuda, soft and usually a darker green unless the bermuda is young and succulent.

There are fewer weed problems when the grass is opened up from dethatching in the fall than the spring. When you open up a lawn in the spring there are lots of spring weeds that can invade. Yes, the small dark green patches with seedheads on many of them now is Poa. Poa is tough to control. The seed is everywhere and tracks with shoes. If your bermudagrass is an improved type you can green it up more with nitrogen and iron and this way the Poa is not as noticeable. But it will always grow a bit faster and is wider bladed than the fine bladed improved bermudagrasses. Poa is a cool season grass so if you don't overseed the Bermuda you could spray it out in December or January with Roundup when the Bermuda is dormant. The problem will be the Poa seed that is everywhere in your lawn. It WILL come back.
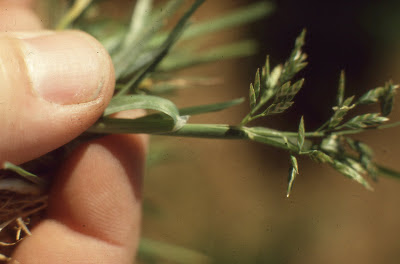
This is a poa seedhead or inflorescence. Poa seeds heavily and can be seen
as a discoloration or graininess to the poa.

I was just looking again at your response to my email. One benefit of overseeding is that it helps to eliminate some of the thatch because you must dethatch the lawn sufficiently for the seed used in overseeding can make good contact with the soil for germination. May years ago common bermudagrass would be burned in the winter to get rid of the dead surface grass and in the process any thatch accumulation. It is still recommended that bermudagrass hayfields be burned for numerous reasons including thatch removal and reduction of insects and diseases.

Years ago bermudagrass lawns were also burned in the rural areas. We didn't have a thatch problem when bermudagrass was burned in the winter. Because we cannot burn dead grass any more due to local ordinances, this dead grass remains and adds to the thatch layer. We now substitute a gasoline-driven machine (called a dethatcher, vertical mower or verticutter) instead of burning the dead grass. This of course uses petroleum, adds pollutants to the air and leaves this bermudagrass thatch that we have harvested for dumping somewhere. A  tool I have used in the past is the Red Dragon propane torch to burn debris. The model with higher BTU's will burn grass even if it is wet. This is an advantage because you can wet down the bermudagrass dead lawn and still burn it which makes it more safe to use. There are lots of advantages to burning bermudagrass thatch but local ordinances may prevent you from using it. The burning is done just before spring growth.

Grape Leaves Cupping


Q. Some of the leaves on my Thompson Seedless grapes have started to curl/cup …see attached pictures.  There is more curling on the newer leaves; the older leaves are OK and the curling is only on one side of the plant.  The Red Flame grapes planted adjacent to the Thompson Seedless grapes are OK and no sign of curling or cupping.  These 5-gallon plants that I planted 2 years ago.  All of the plants are on a dripline system and are watered three times a week, one hour each time.  Each plant has two 1-gallon drippers so each plant is receiving 6 gallons of water per week … is that sufficient?  The plants are in a raised bed approximately 18 inches deep of premium mulch/soil.  Both of the plants have several bunches of grapes and I have already pinched off the bottom 1/3 of each grape bunch.  Any advice would be appreciated.
Leaf cupping on grape. Possibly from 2,4-D or a close relative, a phenoxy herbicide known for its effects on regulating growth of plants at very low concentrations but acting like a weed killer at higher doses.

A. Sounds like a great job and from the looks of it your plants are thriving. Six gallons a week is a bit light in my opinion but watch the plants and they will tell you. If you are getting some good vigorous growth from six gallons then it is enough and I would not change it.

Grapes are normally deep rooted plants and can have roots that go down dozens of feet. In our landscapes this doesn’t make much sense to water deeply to accommodate roots like this so your raised bed sounds like a good depth for the plants. You are watering only to a depth of maybe 18 inches or so, so watering three times a week right now on grapes with this rooting depth makes sense to me. After grape harvest, you could cut back on the frequency of your application (times per week) if you want to but it is not necessary. But you need to maintain good soil moisture during and up to fruit harvest.

It sounds like you are doing everything right. We do have two types of grape thinning; one is removing grape bunches that are too small and spacing bunches so they are not too close together (8 to 10 inches apart) AND reducing the bunch by pinching off the bottom third of the bunch. This is done as early in bunch formation as possible.

You didn’t mention any pest control such as grape leaf skeletonizer, leafhopper or hornworm control so I guess you haven’t seen any.

There is a fourth pest of grapes we see sometimes but not very often and that is the fleabeetle. They are small, dark blue/black rather round looking insects that chew holes in the leaves. They are usually not that devastating so we just ignore them but once in a while they can cause considerable leaf damage in the spring and fall.

Now regarding the leaf cupping. Leaf cupping has to occur on developing (young) leaves since the cupping results from leaf growth in the center of the leaf while the leaf edges either don’t grow as fast or are damaged so don’t grow at all. There are three primary reasons leaf cupping can occur. First is damage from a chemical growth regulator that drifted on to your vines.
Thompson seedless from reader next to affected grapes but no signs of damage.

Grapes can be quite sensitive to these chemicals. One common growth regulator used by homeowners for lawn weed control is 2,4-D and sister compounds that are also growth regulators. Commonly these chemicals are used to control dandelions and other “broadleaf weeds” in lawns. If this chemical were applied to a nearby lawn (could even be 100 yards away) and there was a wind that blew this chemical from the lawn to your grape vine then that would explain the cupping. This type of damage is usually not deadly but just causes leaf distortion. The leaves are not just distorted but weirdly distorted. The leaves will not un-distort or grow back normally. They will be like that until leaf fall. The fruit is safe to eat.

A second possibility are insects that cause plant leaf cupping when they are feeding. The most common insects that do these sorts of things are aphids. The feeding of aphids on plant leaves that are still growing can cause the leaves to cup downward (this is called epinasty in horticultural terms). It is thought that this type of plant reaction to the feeding of aphids is a protection for these insects from predators. Aphids of course secrete honeydew, a sugary substance made from the plant juices they suck, which attracts ants. The ants in turn use the honeydew as a food source and help protect the aphids from predators in exchange for “harvesting” the honeydew. Aphids are not common on grapes.
Aphids feeding on new growth of plum causing the cupping of the leaves due to their feeding on expanding new growth. Aphids are also covering the stems.

This leaves the third possibility and the one I am leaning towards. If the leaves were just coming out and expanding and if there was suddenly a very hot wind OR it got hot quickly and the grapes were tender enough to get some damage to the leaf edges then this would explain the cupping. The leaf edge would dry out from high temperatures or a hot wind and dessicate or dry out. The damaged leaf edge would not be able to grow or grow slowly. The rest of the leaf would be unaffected and would expand or grow. The growth of the center of the leaf while the leaf edge remained unable to grow or grow as fast would begin to cup. The cupping would be worse as it grew more. And of course this would happen only to young leaves which are still growing or expanding. Again, all will be well but you should check to make sure the vines are getting enough water. If they were droughty, the leaf edges would scorch and cupping would result as well.

It might be a good idea to change your drip emitters to two gallon per hour emitters or higher and apply a surface mulch to reduce water loss from the soil.

Thursday, June 6, 2013

Bermudagrass Lawn Requires Dethatching to Look Good


Q. I cant get my bermudagrass lawn to look good. I would like it to look more like a golf course grass. I think one of my problems has be mowing too low, believing it would still green up if I did this. Over the last two weeks I've raised the height of my cut and fertilized. It is looking much better but probably need another week for it all to get up to the same height. I'm getting small patches of darker green grass with a wider leaf. I think this is what they call Poa. Probably little I can do to stop this Poa weed.


Poa annua or Poa as the turfgrass professionals like to call it (or annual bluegrass as some call it) in dormant bermudagrass in December
A. Depending on the kind of bermudagrass it could be mowed up to one inch in height. However, most bermudagrasses perform very well cut at about 1/2 inch in height. Lower than this is for the professionals, in my opinion, and requires very frequent mowing, a grass catcher and fertilizing frequently to look good.
 
Mowing should be done so that you remove no more than 1/4 to 1/3 of the leaf blade. If
you mow when the grass is too long, like in this picture, you leave behind clumps of grass
clippings. I like to call this hay mowing, not cutting the lawn. This also means that when you mow
your lawn short it will reach this 1/4 to 1/3 threshold that much faster and you must mow very
often. Golf Course Superintendents have some bragging rights when they mow their greens and
tees at 3/16ths. Can you imagine mowing to remove only 1/4 to 1/3 of the leaf blade? This means
mowing daily or in some cases twice a day! Homeowners should not be mowing less than 1/2 inch on
bermudagrass unless you want it to own you!

            The lower you cut the grass, the more often it needs to be mowed. When you have a thatch problem, mowing low will make it look worse. You really have to address the thatch problem this fall. If you don't overseed, the best time to do it would be in late summer (August) so that the grass has time to mend before winter sets in. After dethatching, fertilize and water heavily to speed up the repair process.
Thatch comes from dying roots, rhizomes and stolons of bermudagrass. Once it starts to accumulate, then clippings from mowing will also contribute. This must be removed in heavy thatch producers like most bermudagrasses.

            There are fewer weed problems when the grass is opened up from dethatching in the fall than the spring. When you open up a lawn in the spring there are lots of spring weeds that can invade. Yes, the small dark green patches with seedheads on many of them now is Poa. Poa is tough to control. The seed is everywhere and tracks with shoes. If your bermudagrass is an improved type you can green it up more with nitrogen and iron and this way the Poa is not as noticeable. But it will always grow a bit faster and is wider bladed than the fine bladed improved bermudagrasses. Poa is a cool season grass so if you don't overseed the Bermuda you could spray it out in December or January with Roundup when the Bermuda is dormant. The problem will be the Poa seed that is everywhere in your lawn. It WILL come back.
Dethatchers or vertical mowers (the blades spin vertically rather than horizontally as they do in rotary mowers) or even sometimes called verticutters lift the thatch debris from lawns where it can be gathered together for compost. Dethatch in the fall months when weed invasiont after dethatching is less than in the spring months.

I was just looking again at your response to my email. One benefit of overseeding is that it helps to eliminate some of the thatch because you must dethatch the lawn sufficiently for the seed used in overseeding can make good contact with the soil for germination.

May years ago common bermudagrass would be burned in the winter to get rid of the dead surface grass and in the process any thatch accumulation. It is still recommended that bermudagrass hayfields be burned for numerous reasons including thatch removal and reduction of insects and diseases. Years ago bermudagrass lawns were also burned in the rural areas. We didn't have a thatch problem when bermudagrass was burned in the winter. Because we cannot burn dead grass any more due to local ordinances, this dead grass remains and adds to the thatch layer.
Its a proven fact. Mowing affects the rooting depth of grasses. Close mowing
results in shallow rooted lawns. Shallow rooted grasses are more
prone to drought problems than lawns mowed higher

We now substitute a gasoline-driven machine (called a dethatcher, vertical mower or verticutter) instead of burning the dead grass. This of course uses petroleum, adds pollutants to the air and leaves this bermudagrass thatch that we have harvested for dumping somewhere.

A  tool I have used in the past is the Red Dragon propane torch to burn debris. The model with higher BTU's will burn grass even if it is wet. This is an advantage because you can wet down the bermudagrass dead lawn and still burn it which makes it more safe to use. There are lots of advantages to burning bermudagrass thatch but local ordinances may prevent you from using it. The burning is done just before spring growth.

Monday, May 27, 2013

Grey Colored Beetles on Zucchini Most Likely Squash Bugs


Q. Every year my zucchini plants are infested with grey-colored beetles that destroy my zucchini.  How do get rid of the beetles?
Squash bugs on the underside of squash leaves.


A. These are most likely squash bugs. You can verify it by visiting my blog and checking the picture I posted to confirm it. It is not just zucchini they will attack but other squashes such as winter squashes, melons and sometimes cucumber. It is reported that butternut and acorn winter squashes are somewhat resistant.

            You can plant late, in June, after their infestation time has passed. However you may have a hard time getting the fruit to set when temperatures are very high.

Squash bug damage and infestation on squash
            You can hand pick them as you see them. You must do this as they appear soon after planting and get rid of them as soon as you see them. Do this for about three weeks and the numbers will be greatly reduced.

            Thirdly, you can vacuum them with a handheld vacuum cleaner. They will be on the undersides of the leaves so look for them there. 

Fruit Tree Selection for Nevada at 5000 feet


Q. My friend and I would like to plant a few fruit trees on some property at Acoma Siding in Nevada. It is near Barclay, Nevada, east of Caliente about 20-30 miles. I was wondering if you had some advice on types and varieties of fruit trees that may do well there. I believe it is in the 5000' elevation.


A. This advice would also apply to property in southern Nevada on the way up Mt Charleston and other higher elevations.

            Your best bet will be to plant on the side of a hill, if you can do it, to avoid late spring freezes. The major limitation for you is minimum temperatures and late spring frosts. To avoid these as much as possible planting on the sides of hills and avoiding low spots where cold air can accumulate would be safest.

            Without knowing your exact low winter temperatures it would be safe to assume you are in apple, pear, sour cherry and plum country. Perhaps you might also try berries such as raspberry and other cane fruit. The best website for general growing information on fruit selection for colder spots of the West will be Dave Wilson Nursery and can be found at http://www.davewilson.com

            Stay with fruit with a higher chilling requirement, probably around 800 to 900 hours, and check their requirements for pollination. Some apples might be Rome, Delicious, Northern Spy, Harrelson among others.

            European pears might include Bartlett, Comice and D’Anjou. But higher chilling hours may be one indicator that they will probably perform better for you. On apples, have them on a dwarfing rootstock such as M111.

            Because you are in a very arid climate with desert soils, mulch the soil and add plenty of soil amendments at the time of planting. That should get you going.


Bottle Tree With Dying Branches


Q. Our bottle tree branches are getting dried and  one side of the branches died 2 years ago. I am enclosing photos of the tree. Can you tell what is wrong with this tree? We love this tree very much. Is there any way to keep the tree from dying?
Bottle tree with dying branches.
 

A. There are two main problems that can develop on bottle tree; those are sunscald on the smooth branches and trunk if put into very intense sunlight and root death due to too much or too frequent watering.

Trunk of bottle tree
            We must also remember that their smooth green trunk and limbs get brown and furrowed with age so there is a natural progression from green and smooth to brown and furrowed. This must not be confused with brown and dead or dying.

            Some of the pictures you sent seems to show much of the dead parts of the limbs are on the upper surfaces of the limbs which kind of points to sunburning. This can lead to limb dieback.

Upper canopy of bottle tree.
            It is important for this tree to maintain a full canopy to shade the limbs. Most of this type of damage might be on the side facing the most intense sunlight which is on the upper sides of limbs particularly on the south and west sides of the tree. If someone got in there and pruned them improperly this could cause a lack of shading and sunburn with limb dieback.

            The other possibility is root rots due to frequent irrigations and not letting the soil dry out between irrigations. This plant comes from semi-arid (but not necessarily desert) regions of Australia. They will tolerate lawns but the soil must drain quickly.

            All you can do now is to remove dead limbs, keep it watered adequately but not excessively and fertilize once a year in the early spring. Surface wood mulches will help as well.

I Planted an Apple Tree. Now What Do I Do?


Q. My husband went out a couple of weeks ago and picked up a Pink Lady apple and I have planted it.  I have it planted how you recommended and I have it mulched the ground  except for the 6" next to the trunk. I have it securely staked it and I am watering by hand everyday. What next?  Food, or what to make it do well?  
Anna apple at UNCE orchard in North Las Vegas in October

A. I would not water daily but probably every two or three days. If you are doing it by hand you should put a moat around it about four feet wide and 4 inches deep. Fill the moat twice when watering.

            If you have drip irrigation going to it you should still handwater the first couple of weeks before you transition to your drip irrigation. This will help to settle the soil around the roots, remove any air pockets and moisten the soil outside the root system. After transitioning to drip, you will not need the moat UNLESS you use the adjustable drip emitters.
Bare root fruit trees planted, staked and protected from rabbits with chicken wire. The trees
are surrounded by a moat or basin for holding water. These are watered with an irrigation bubbler.
They were then mulched with green waste, chipped trees removed from Las Vegas landscapes.
The mulch is kept away from the trunk several inches to prevent collar rot of the tree.

            If you added plenty of compost to the soil when planting it probably will not need anything else applied to the soil this season. If you were skimpy with the compost in the planting hole then add a fertilizer application now or no later than about mid-June. If you are an organic grower, use a compost addition to the irrigation moat or compost tea as a fertilizer source.

            However if organic sources are not that important to you then you try using some liquid fertilizers, such as Miracle Gro or similar product. Dilute this fertilizer into a five gallon bucket and use the five gallon fertilizer solution for one of your waterings in the moat. If you do not have a moat, try some fertilizer stakes pounded in next to the drip emitters.
Fruit tree fertilizer stake with plastic cap for hammering into the wet soil near a drip emitter.

            You will remove the stakes holding the tree roots still (not the fertilizer stakes) at leaf fall this winter. Staking the tree to stabilize the roots during one season of growth is all that is necessary.

            If you have rabbits in the area you will probably need to add rabbit protection in the form of a cage around the tree. This will require chicken wire that is two feet wide with one inch hex openings or smaller. Cut a piece three feet long and circle it around the tree into a cylinder, tying the ends together to keep the cylinder from coming apart.

            Bury the bottom a few inches below the mulch and stake it to the ground. This helps to keep rabbits from going under the cage.

            You can prune lightly any time but removal of larger pieces of the tree structure should be done in the winter. It is too late to remove large wood from the tree. If you do, you run the risk of sunburn damage to the trunk or limbs.

            Some pruning you can do now includes removing small limbs that are broken, weak or are competing with other branches. If there are branches growing directly above another branch, remove the weakest or less desirable of the two.

            If there is one branch growing into another branch, remove or cut back the one which is interfering. If there are branches that are growing straight up or straight down, remove these. These are all cuts you can do now. Removal of branches is usually preferred over just cutting them back.

Birdseye view (from above the tree) of the scaffold limbs radiating from the trunk like spokes in a wheel.
            If growth is excessively long, I usually cut them back as well to about 15 to 18 inches. This will help initiate fruit producing spurs if the tree is a spur producing tree like apple, pear, plum or apricot.

            If you would like to keep the tree smaller than it would normally get, this next winter remove the center, if it has one, from the tree at around waist height or below leaving five or six limbs radiating from the trunk. After pruning this winter, paint the tree with diluted white latex paint (50/50 with water). Paint all the trunk and all major limbs to help prevent sunburn.

Monday, May 20, 2013

We Have an Ocotillo Competition Going!

Cathy and Bill think they have the largest ocotillo in Las Vegas. Does anyone want to challenge them? It is about 22 feet tall. Keep your eye on this posting. I will update it as I learn more.


They sent me a picure of its base.

Orange Tree Dropping Fruit


Q. My orange has lots of blossoms, they begin to set the fruit, but when the fruit becomes the size of a pencil eraser, the fruit drops off the tree. What is going on? I watered it, and applied fertilzer.
 

A. I have two questions that might shed more light: 1. Is this tree planted less than three years ago? and 2.  Is it a Navel type orange?

Sometimes it takes a few years for the plant to come into enough maturity to set and hold the fruits. . . . And dropping fruits is a common complaint with Navel Oranges. . . They set fruits and when the heat hits or the first dry wind and they slough off most, if not all their fruits. . . With time more and more will fruits will make it to maturity. . .. Most people are disappointed with the quantity of Navels but not the quality.
 
Terry Mikel

Sunday, May 19, 2013

Yellow Vomit-Like Thing Could Be Mushroom Related


Q. I found this thing in the picture I sent to you under my Joshua tree this morning. It is about 6 inches long?  Is it mold?  I only water three times a week for 5 minutes
Yellow "Thing" Under Joshua Tree

A. I get a picture of this once a twice a year, usually in the spring when it is cooler, there has been rain and there is plenty of wood chips for it to feed on. This is called a slime mold. Kind of resembles vomit.
Slime mold on wood mulch at the orchard.

They can range in colors from yellow to orange and are related to mushrooms in a very loose sense. Like mushrooms they are a decomposer and feed off of decaying organic matter like wood mulches or undecomposed organic matter in the soil. We see them in the orchard a lot feeding off of decaying wood mulch.
Slime mold in a lawn. It is feeding on decaying grass either as thatch or clippings or both.

No treatment is necessary. It is a good guy since it breaks down woody debris. Does not attack living plants. If you want to be an industrialist, destroy it with the back of a rake and rake it into the mulch and soil. It will probably come back at some time but like a pest would but it is a pest only because we are afraid of it. I will post pictures of some on my blog.

Fungus Gnats Can Be Controlled With Special Bt Formulation

Q. I recently transplanted two house plants and now  have gnats coming out of the soil and infecting my entire house.  Is there any way to kill these little buggers or do I have to get rid of all the dirt and start over?

Since We Cannot Burn Bermudagrass in Early Spring Anymore We Are Forced to Use Equipment to Keep it Looking Good


Q. (Response to an eariler posting I made regarding a bumpy bermudagrass lawn). I have a TruCut reel mower. I think the lawn is flatter than the impression I gave you in my earlier question. The bumpiness might be more from uneven thatch, thus thin spots. I aerated it several times last year. Maybe I need to feed and mow more often. It can also be due to weight imbalance with speed of the mover, thus with a front throw, I notice that when the basket is fuller, the bouncing is less. The lawn has never been as nice as I want. I feel the peak season is short in this climate.
 

A. Las Vegas sits in what educated turfgrass professionals might call the "Transition zone". The US has three major turfgrass growing regions; climate suitable for cool season grasses like bluegrass, a climate suitable for warm season grasses like bermudagrass and this odd area in between these two climates we call the "transition zone". The transition zone is capapable growing both warm and cool season grasses equally POORLY. Kind of reminds me of those tools that are 8 in 1; they can do eight different jobs but none of them very well. Kind of like a Swiss Army knife or a Leatherman.
 
I was just looking again at your response to my eariler email and question on bumpy lawns.  One benefit of overseeding is that the process of overseeding helps to eliminate some of the thatch because you must dethatch the lawn sufficiently so that the seed used in overseeding can make good contact with the soil for good germination.
 
Burning a berumudagrass hayfield primarily for weed control at the Batesville Station of the University of Arksansas.
Photo courtesy of the University of Arkansas Cooperative Extension (http://batesvillestation.uark.edu/3_.jpg)
Many years ago common bermudagrass would be burned in the winter to get rid of the dead surface grass and in the process any thatch accumulation. It is still recommended that bermudagrass hayfields be burned for numerous reasons including thatch removal and reduction of insects and diseases.

Years ago bermudagrass lawns were also burned in the rural areas of Nevada and probably still are in some places. This is smart for several reasons that I will not get into here. We didn’t have thatch when bermudagrass was burned in the winter. Because we cannot burn dead grass any  more due to local ordinances and safety issues, this dead grass remains and adds to the thatch layer.
Dethatcher, vertical mower or verticutter. It can be used for several things but commonly used to remove thatch from
thatchy lawns or turfgrass areas. Bermudagrass can be a heavy thatch producer.


We now substitute a gasoline-driven machine (called a dethatcher, vertical mower or verticutter depending on who you are talking to) instead of burning the dead grass. This of course uses petroleum, adds pollutants to the air and leaves this bermudagrass thatch that we have harvested for dumping somewhere. Or burning. Aren't we smart?


Lots of Variabilities in Garlic Size Could be Due to Many Things


Q. My last load of mushroom compost with chicken poop had redwood chips in the load.  The guy who delivered it didn't clean his truck bed before hauling over my load of compost.  So, I've no idea if this contributed to the smaller garlic bulbs OR if i did something wrong OR if was the early 90 degree weather W/ the cold/freeze snap we had 4 times this spring. Spacing was 4"/6" apart in a  triangle grid; the other bed was 6"/6". I used a tape measure to mark off the beds.

The garlic was screaming to be pulled; some of the bulbs had already begun to split. The Polish White (no photo) usually grows medium bulbs; I have small and extra small bulbs.  Just a few with normal size. Since the size of the bulbs was consistently inconsistent in both beds, I bet you anything it was the compost.  I found out much too late that the 'organic' fertilizer store I used was not the correct place.  There are two in town.  One with high quality compost (I used it the year before.  Last years harvest was exceptional), and the other with inferior compost (I used this year by accident).  Live and learn.

Oh, and when I was prepping the beds, I forgot to use the blood meal.  May have been better that I forgot.  I have others tell me they've gone out and found their beds torn from animals smelling the blood.  We have all sorts of wild life out here.


Readers garlic. Good quality but some irregularities in size. This can be caused by many things.
 
A. This was a question submitted from Texas. Okay. Here's the deal on size of garlic. Planting larger cloves results in larger bulbs. Use the smaller ones for cooking or drying.

                       Spacing. They should be no closer than 4 inches apart if you are pushing size. I use drip tape and I plant on either side of the drip tape in triangular spacing to give them more room.

                       Bulb size is diminished with salinity. If your chicken manure was pretty hot or the compost was somewhat saline expect smaller bulb sizes.

                       C:N ratio. If the carbon to nitrogen ratio (amount of nitrogen in the compost) is too high it will diminish bulb size. Ideal C:N ratio is around 20:1. If it gets above 40:1 you have to supplement with additional nitrogen.

                       Harvested too early. I couldn't tell from the pic but what told you to harvest the garlic? What are the indicators you use to harvest? The bulbs look a bit young but what I could see of the tops there appeared to be some dieback. In northern California they let the tops fall over. We can't do that in Nevada but harvest when about 1/3 of the foliage is brown which is early for other places.

                       Not enough phosphorus in the bed. Did you apply phosphorus at the time of planting? I supplement with nitrogen through the growing season by sidedressing with my favorite N fertilizer. If organic you can use blood meal or guano or fish emulsion. If not organic then sidedress with ammonium sulfate.

                       You should know the quality of your compost. They should provide a copy of the test results. Usual problems with compost are salts too high, C:N ratio wrong or too high, high concentrations of toxic minerals such as boron, compost unfinished and needs time to finish. It should not be hot in temperature when delivered. Compost is finished when it has cooled down and the microorganisms have begun to die off.

                       A little bit of redwood shouldn't hurt. However, it does have a stunting affect. We see this in redwood beds when flowers are grown close to the boards.

                       Remember to supplement the planting hole with phosphorus...bone meal...not blood meal. Then sidedress with nitrogen every 30 days. Others will say not to sidedress. Try both. Apply nitrogen (blood meal or equivalent) every 30 days along the row a few inches from the bulb on half the plantings. Liquid would be better such as compost tea if you are organic. If animals are a problem maybe use compost tea applications.


Lots of Nutrients are in the Soil and Water But Sometimes the Plants Can't Get to Them


Q. Are there any micronutrients in our hard Vegas water of significant quantity?   I ask because I'm wondering if say a fertilizer I use lacks a certain nutrient (say calcium), could it be made up for through regular waterings alone (assuming we remove soil from the equation and all things being equal)? Can we definitively conclude our water is calcium-rich or sulphur-rich or whatever rich?

 
A. Micronutrients are kind of a funny thing to try and predict. Yes, there are lots of many nutrients (micronutrients as well as major nutrients) present in our soils and water as well as calcium, magnesium and other major or macro elements but not a sizable amount of nitrogen, hopefully.

This chart shows the effect of how acid or alkaline soil water is on 12 nutrients available for plants through their roots.
Take iron in the center of the chart, for instance. The grey bar that iron resides in is wider on the left side and becomes
narrower as we follow the bar from left to right. The wide part of the band means there is plenty of iron available to the plant. As the band decreases in size, its availability to plants decreases as well. Also notice that the pH scale on the
 bottom increases from left to right. From this we can conclude that as the pH increases (becomes more alkaline) the amount of iron that the plant can get from the soil is smaller. Even though the total AMOUNT of iron is unchanged, what the plant
can get from the soil decreases as the soil (or water) becomes more alkaline. This breakeven point for the plant varies
but is basically a problem starting around a pH of 7.5. If we know the pH of a soil or water, we can get a rough idea
which nutrients, in general, will be a problem for plants or not.
 
Just because the micronutrients are present does not mean they will do the plant much good. They must be in a form available to the plant to use. Micronutrient (and major nutrients as well) availability to the plants depend on how alkaline or acidic the water is (pH) as well as what is called the oxidation/reduction (redox) potential of the water. As alkalinity rises (pH increases) the availability of iron, manganese and zinc become more limited. So in our soils, not just in our water, the alkalinity affects whether the plant can take up these micronutrients.

The quantity of iron in many of our soils is more than adequate for plants BUT because the soil is alkaline the plant can’t use them efficiently. By making the water or soil more acidic these micronutrients convert to a more available form and the plant can take them up. Thus we have those iron fertilizers that are mixed with sulfur to help make the soil more acidic (e.g., Ironite) and we have chelates which bind the iron in an a form available to plants and release it in this form so the plant can take it up and use it (EDDHA, EDTA, DTPA). Unlike Ironite, for instance, the chelates do not affect the acidity of the soil making the iron (or any of the other micronutrients) more available to plants.
Ironite is a product that combines sulfur and iron in a single application.
The reasoning is that the sulfur will lower the soil pH as it is "consumed"
by soil microorganisms. This lowering of the soil pH will then make
the iron residing in the soil close to it, more avaible to the plant.
Sprint 138 is an iron chelate. Chelates work on the priniciple
that this chemical "claw" protects the iron from chemical reactions
and allows the iron to be used by the plant. The chelate is EDDHA.
The chelate is then called Iron EDDHA or FeEDDHA.

Those are the two methods used to make micronutrients available to plants;
  1. increase acidity, or
  2. chelate (protect) the nutrient in a form available to plants.
So are the micronutrients in adequate supply in our water? No, but they are in high enough quantities in MOST soils in the valley to satisfy most plant requirements IF the soil were more acidic. So we end up applying a liquid calcium (usually calcium chloride) to the fruit in multiple sprays (usually five or more) as the fruit is developing to alleviate corky spot and bitter pit in a highly productive orchard. But our soil is LOADED with calcium and you would think…no… that’s impossible, it should never happen.

Just because there is a lot of something in the soil or water does not mean the plant can get to it. Sometimes, besides the pH being a problem, these nutrients may be “bound up” either as secondary minerals (calcium in the form of calcium carbonate = limestone).

Calcium carbonate does not dissolve quickly. So if crops have a high demand for calcium over a fairly short period of time (March through August) they may not be able to get enough of that mineral (calcium) from the bound form (calcium carbonate or limestone). For instance, on some cultivars of pears and apples their demand for calcium can be very high over a relatively short period of time during development and the soil cannot release enough calcium to keep up with this large and quick demand. Thus the plants become calcium deficient (from this deficiency we develop disorders like cork spot on pear and bitter pit on apple; they are the same problem, a lack of calcium, but given different names on different crops).
Bitter pit in Mutsu apple grown in the Las Vegas valley.  Even though it looks like a "cork spot" which is the name
given to this disorder in pears. The brown spot may "erupt" on the surface as a blemish like this and/or it may also
cause discoloration of the white flesh under the skin. Sometimes it does not appear until after harvest.
This is cork spot on Comice pear. Notice the green "dimples" on the outside of the skin. Also notice the brown discoloration just under the skin and reaching into the fruit. Both corky spot and bitter pit are due to a lack of available
calcium from our calcium rich desert soils of southern Nevada. Calcium sprays (in our case using calcium chloride)
sprayed on the fruit during development helps to alleviate these problems.
 
Golf course superintendents see this problem too in our arid West. These very expensive golf course greens and tees are built totally on sand. The grasses on these spots sometimes develop calcium deficiency even though the water contains LOTS of calcium but the sand may not. They must apply calcium to their greens and tees even though the soil surrounding the greens and tees and the water they are applying is saturated in calcium in bound up forms. Because they cannot return the clippings to these spots (interferes with play) the nutrients are carted off these areas and dumped after mowing. If they could return the clippings and let them decompose back into the grass it would lessen the problem.
If turfgrass clippings are removed from the lawn area, this does not allow the nutrients to be recycled into the lawn area.
Mulching mowers are used to cut up the clippings into tiny pieces so that they decompose rapidly and release the
nutrients back to the soil where they were in the first place.
 
So a long winded answer to your question. Yes, there are lots of these nutrients around but often times they are unavailable due to the chemistry of the water, the soil and interactions with the plants.


Can I Prune My Shoestring Acacia Now?


Q. I planted a shoestring last Spring, and it is doing well. It has five lower limbs off of the main trunk and one of them is all most as long as the tree is tall. I was wondering if I can cut them off this Fall? They are so low they will be removed eventually any way. If I remove them will it help the main trunk to grow faster? Will it hurt the tree to cut them off now?


A. There are several things you can do about this. You will not hurt the tree to remove a few limbs (particularly lower ones) now. When I went to school and studied arboriculture, my professor would say two things I will never forget; the best time to prune is when the pruners are sharp AND if you know how to prune, you can prune using only your thumbnail. I have always strived in learning how to prune, what he meant by that. As time passed, I slowly learned.
 
In the desert we have to be a bit more careful in pruning because our environment is so harsh but the principles he taught me are still valid.

            Remove tree limbs very close to the trunk, making the cut with a sharp, clean and preferably sterilized pruning shears. Make the cut leaving a tiny bump (called the shoulder) intact on the trunk. Don’t cut flush to the tree trunk.

The shoulder of a limb attached to the trunk and where to make the cut in relation to the shoulder.
            Let me explain better where to cut. If you look at the limb, where it attaches to the trunk, you will see that it flare (become wider) at its base, at a point where it attaches to the trunk. Cut with the smallest cut possible but as close to this flair as you can. Do not leave a stub. Leaving this flair intact on the tree trunk is NOT leaving a stub.This type of cut, not cutting into the flair, will heal much faster than if you cut or remove the flair. You do not need pruning paint.

            If limbs are too long, yes, go ahead and cut them back now. Not a problem. You just do not want to make major cuts that change the basic structure of the tree now which opens it up to sunlight that might damage the limbs and trunk through sunburn.

            The fewer side branches or limbs you have (within reason), the faster the tree will grow in height. So remove smaller, weaker limbs or branches at the trunk. You can do that now as well.