Type your question here!

Thursday, September 26, 2019

Recently Planted African Sumac Leaf Curl

Q. I recently found your blog and wonder if you have any advice for me about an African Sumac that we planted last October. It did beautifully through the winter. About a month ago, I started noticing some leaves curling up, but staying green. Now the lower branches are drooping and over half of the leaves have curled, but stayed green. Rot? Fungus?

I did one treatment of ferti-lome around the base last week. No change.

A. Watering too often and not watering enough can give the same results so I can see how it could be either way. The only way to know for sure is know how wet the soil is when you water again and how much water you are applying.

When you water African sumac, water it with lots of water over a large area under the tree canopy and don’t water again until it is about half gone. One of the problems with tree installations by the contractors who plant for Moon Valley I have been told in the past is the size of the hole they dig for the tree and lack of amendment added to the soil when planting. This could be part of the problem for you as well.

The hole provided for the tree  should be at least three times the size of the container. If this was a 24 inch box tree then it will be a big hole that is dug. The hole does not have to be deeper than the container but three times its width. I don’t know how much amendment was added but it should be about the same volume as the soil taken from the hole.

What can you do now? Remember this in the future but there is not much you can do to a tree that was already planted. I tell people who buy trees to be planted by a contractor from Moon Valley is to pay them extra cash and have them dig the hole wider.

 Buy your own amendment like Viragrow’s compost and provide it for them instead of the bags they bring. Water the tree in the hole AS it is being planted and flood the area planted three times, once a day. Then turn it over to the drip or irrigation system but do not water daily. Provide enough water each time you irrigate to get it down to 18 inches deep.

Water the area under the canopy of the tree at least half its width. All its width is better. Use a four foot long stick of rebar to determine this by pushing it in the soil until it is difficult to push. Water again when the soil in the upper four inches is starting to dry out.

You can use a $10 moisture meter to determine this.


Water when it reads “5-6” in three locations under the tree canopy where you watered.

How and Why to Take a Leaf Tissue Nutrient Sample

A leaf tissue analysis would show that this ornamental pear is lacking iron.

Why Send a Tissue Analysis?

The purpose of submitting leaves for a leaf tissue nutrient analysis is to find out the reasons why plants might look sickly or not performing the way we would like. These types of leaf tissue analysis identify nutrients found in the leaves and help to identify which ones may be in short supply. These types of tools are used by growers to adjust which fertilizers are applied and their timing of application in efforts to boost production or performance.


A leaf tissue analysis would show this peach tree is iron deficient

What the Sample Wont Tell You

Submitting a leaf tissue sample has nothing to do with identifying an insect or disease problem, chemical poisoning problems from weed killers or other toxic chemicals. These types of problems are best handled a different way.

Baseline Sample is Needed

Submitting leaf samples from a problem plant are not enough. Leaf nutrient analysis information is needed from acceptable plants (this establishes a baseline) as well as the problem plant. It's best these plants are genetically close to each other (the same variety or cultivar is best), they are approximately the same age, the leaf samples taken from the same locations and similar times of year. 

even though it looks like it might be nutritional, its not. Leaf tissue analysis wont show a disease problem developing like this

Sometimes two samples are submitted; one from acceptable plants and another from problem plants. When historical information exists, this information can be used as the baseline for submitting leaf tissue from problem plants so always keep old leaf tissue analysis reports!

How to Take a Sample

Select a plant or group of plants showing a suspected nutritional problem.  The plants may all be in the same area or they may be scattered through the growing area. If this problem is on only one plant, sample a single plant. If the problem is on several plants, take subsamples from several plants showing the same symptoms and combine them into one sample.  

Take leaf samples at a time of year used to establish historical baseline information. For example, if the baseline information you are using were from plants sampled in the spring of the year, take samples in the spring. If baseline information was in Midsummer, take samples in Midsummer. In some cases, a new baseline may be needed. If submitting one sample from problem plants and another from acceptable plants to establish a baseline, then these are taken on the same date.

Take leaf samples from similar areas of the plant and establish where on the plant samples should be taken from. In some cases, this might be newer growth and in other cases older growth. A simple way to do this is to take leaf samples at similar distances along the stems.

Document and Label

Label these samples in a clean plastic bag using a permanent marker with a 4 letter Code name, date they were taken, and area of the plant taken from (old growth vs new growth). Place these leaf samples in a refrigerator until they are ready to be sent to the lab for analysis.

Take notes. Write what you did and how you did it in a log or notebook. Believe me, you wont remember it next year.

Contact the Laboratory

Download submission forms from the laboratories website and fill out the paperwork.  Call the laboratory and make arrangements for the shipment and any fees that must be paid ahead of time. It is important that these samples are as fresh as possible so keep them in the refrigerator until they are ready to be sent, overnight, to the laboratory. Send them to a laboratory at the beginning of the week so they're as fresh as possible.

A plant tissue analysis laboratory that I frequently use is A and L Laboratories in Modesto CA with the website http://www.al-labs-west.com/

Friday, September 13, 2019

Desert Horticulture Podcast: Fix Your Landscape

Learn some of the basics about why landscapes have problems. Sometimes its how the landscape was designed, plant selection or irrigation. Save water and money on your power bill by following taking some simple advice.


Tuesday, September 3, 2019

Desert Horticulture Podcast: Maintaining a Lawn in the Desert

Maintaining a lawn in the desert is not easy. Learn the fundamentals of desert lawn care: irrigation, fertilizing, mowing, aerification and dethatching.

Deseert Horticulture Podcast: How to Establish a Lawn

Lawns are sometimes a necessary part of a desert landscape. And when you are finished with it, the soil is improved and its easy to replace. Learn how to establish one in our desert climate.

Monday, September 2, 2019

Hearts and Flowers Failure

Aptenia, or Hearts and Flowers, is a succulent that looks good with a little bit of shade and not in full sun unless the soil has been amended well.

Q. This spring we re-landscaped our yard to include six groundcover plants called Hearts and Flowers groundcover planted in full sun. They did well in the cool, rainy spring.  As the weather got warmer, most of them turned brown starting at the center of the plant and extending outward.  They are watered with two each, 2 gallon per hour emitters for 30 minutes three times a week.

A. It sounds like it just got too hot for them in that location. These plants are short-lived in the desert. Hearts and flowers are succulents and not as tough in full sun as many cacti. They grow best in the cooler months of spring and fall. They originate in the warm and dry parts of South Africa in locations that have summer monsoons.
            Hearts and Flowers will grow in full sun out in the open if it is not a southern or Western exposure with reflected heat. Plants will handle heat better if they are planted in soils amended with good compost but prefer light shade in the afternoons. The best place to put them is morning sun with some light shade in the afternoons or on the east facing side of a wall. Typically, they have very few pest problems.
           

Fall Annuals to Purchase and Plant from Seed


Q. As much as I love them, the geraniums are just too high maintenance for me this year. Gave up on them. Can you recommend something, in addition to Lantana, that is colorful and low maintenance?

A. Like vegetables, flowering plants have a time of year when they perform best. Lantana is generally a summer flowering woody perennial while geraniums flower best in our climate, even though they are perennial, during the cooler months of October through March. The usual planting dates may vary somewhat with the weather, but it should be around early to mid – October.

Commonly Found Geranium Alternatives

Some common alternatives for geraniums used as annuals during the winter months include Snapdragons, Pansies, and Petunias planted with Alyssum and Lobelia. Even though they aren’t true winter annuals, they grow best during the cooler weather of mid fall through early spring.

Start Fall Flowers from Seed

Some fall flowering plants for fun that you can start from seed include 
  • Alyssum (L)
  • Bells of Ireland (T)
  • Calendula (M)
  • California Poppy (L)
  • Candytuft (T)
  • Cornflower (M)
  • Gilia (L)
  • Godetia (L)
  • Iceland Poppy (M)
  • Larkspur (T)
  • Lupine (M)
  • Nemesia (M)
  • Nemkophila (L)
  • Pansy (L)
  • Phlox, Drummondi (L)
  • Pinks (L)
  • Stocks (M)
  • Snapdragons (M)
  • Verbena, Sand (L)
  • Verbena (L)
  • Viola (L)
L=Low   M=Medium Height   T=Tall

Many of these will self-sow themselves year after year.

Big in the Back


Pay attention to their mature size. Taller plants go in the back of the planting area and smaller plants go in the front. Before planting any of these non-desert flowering annuals, mix a decent compost into the soil before planting if it’s going in a bed.

Amend the Soil Each Year and Fertilize Regularly

 A 1-inch layer of compost mixed into the soil 6 to 8 inches deep annually at planting time, just like a vegetable garden, is enough. If the compost is a dark brown or black amendment “rich” in nutrients, don’t add any fertilizer at planting time and for the first 2 to 3 months after planting. If the compost is not rich, mix in a high phosphorus fertilizer with the compost just before planting.

Deadheading

Deadhead these plants regularly. Removing spent flowers produces more flowers and extends the life of the plant. Fertilize these winter annual flowers lightly with a high nitrogen fertilizer once a month.

Pine Tree Not Growing

This pine is struggling. Notice the open canopy, how thin it is.  It is either not getting enough water or it was rootbound at planting time. 

Q. Several pine trees on municipal park property provide privacy from people who frequent the adjoining park. All these pine trees have done well over the last 20 years except for one that is about half the size of the others. It’s in a perfect spot to provide privacy for me but doesn’t because of its size. It gets plenty of sun and is not overcrowded by other trees, but I don’t see any water for any of them. How do I help the little guy pine tree get to the same size as his big guy brothers?

This pine tree is getting enough water. Notice how full and dense the canopy is.


A. All those pine trees are irrigated, or they wouldn’t survive in our desert climate and put on decent growth year after year. The smaller tree could have a problem all its own, separate from the others.

Is it Rootbound?

            The fastest way to find out is to push hard on the tree trunk. You may have to push several times. After these many years, that tree should be solidly anchored into the ground. If it’s loose in the soil, the tree has a rooting problem and should be replaced. If a tree with this problem is not replaced, it will always be small and never grow regardless of what you do.
Plants that are rootbound can end up with strangling roots that choke other roots. These can be removed with they are young. Be careful when the roots are large.
            When you push on it, there should be no soil movement where the trunk enters the ground. If you do see movement beneath the trunk, the tree was “root bound” when it was planted and never became established in the surrounding soil. That would be unfortunate, but this happens too frequently to landscape plants grown in containers.
Plants left in containers too long can create root problems.

            “Rootbound” plants have roots that grow in circles inside the container. This root growth problem begins when plants are very young and is seldom a problem that develops when they are older.
            It is possible plants can become “root bound” if they are grown in a container which is too small for them for too many years. I suggest consumers don’t focus on the “largest trees they can find”. Smaller plants, that are healthy and growing rapidly, are always a better choice and will establish in the landscape faster.

Lack of Water

            Another possibility is a lack of water. Inspect the soil to make sure that irrigation is not the issue. If the plant is not root bound, water the soil under the canopy of the tree with a hose, sprinkler and mechanical timer for one hour, once a week. Do this during the summer months. Fix the irrigation problem of course but the extra water once a week will help push new growth faster.
            Fertilize pine trees once a year in the spring with a tree and shrub fertilizer such as 16-16-16 or 20-20-20.

Microclimates in the Desert are Important


Some people think I’m crazy when I mention the importance of microclimates in landscapes. Others may be unsure about what they are, how to establish these microclimates and if they’re worth the expense. It’s really whether you value the selection, appearance and quality of plants growing in your landscape.

This microclimate was established next to a hospital on Maryland Parkway in Las Vegas. It is sunken, protected from Maryland Parkway traffic on the left and its noise. It also gets several hours of midday sun and the smaller plants and the ground protected from late afternoon sun from the West (left). This makes an area for employees where there is less noise and cooler.

Microclimates affect how plants grow and appear in the desert, their quality if you’re talking about vegetables growing in raised beds or fruit on fruit trees and how comfortable we are when enjoying a beverage or meal outside. Landscape microclimates change something about the outside: the air temperature, wind speed, humidity, noise level or may address privacy issues. All these change the microclimate in an otherwise open landscape.
Some construction going on so the yellow cord is there but plants that might normally struggle in rock due to the heat and intense sunlight perform better with a break due to a microclimate.

A recent stroll through a commercial property on Maryland Parkway reminded me how important these changes can be for plants and for us. A section of this commercial property lowered the strolling and sitting area below this north to south running street. This change provided morning and afternoon shade, change the direction of the wind and lowered wind speed and reduced the noise level from passing traffic 20 feet away.

Plants like this Japanese privet perform better where they have a break from the intense desert environment.

Here I found outside sitting areas enjoyed by employees on a hot morning. I found plants thriving, compared to their struggling counterparts 50 and 75 feet away. A simple lowering of the landscape elevation provided “comfort” for plants and humans alike without changes to the soil or irrigation different from the rest of the landscape.
Plants like this daylily planted in rock looks much better than its counterpart planted along the street.

Be Creative with Microclimates at Home

Changing the landscape elevation is one way to address problem areas. Other methods include trellising, building wind screens or diversions, use of gazebos, building partial walls, using manufactured screening, paint and other methods that provide a microclimate that improves the quality of plant growth and the outside living area. Remember that cement and steel are more durable surfaces than wood in the desert.
            I will talk more about this subject on my podcast.

Lawn Dies in Midsummer

Q. My father’s lawn is tall fescue and completely went dead this summer. I’d like to know what we did wrong because we watered twice a day. We are anxious to plant a new lawn ASAP and want some advice on how to plant a new lawn from seed and the best seed to use. The lawn gets full sun.

A. Whatever killed the lawn is most likely gone. I know you watered twice a day, but death of an entire lawn during the summer is nearly always due to an irrigation problem. There are diseases and insects which cause damage, but they always leave behind telltale patches of green. These patches of green, to a trained eye, are clues to the cause of dying grass.

Lawn disease

Leave it Alone

            Wait until the temperatures cool down a bit, perhaps sometime between late September and mid October, to begin planting a new lawn. In the meantime, leave the dead grass in place to shade the soil and prevent weed growth. This layer of “mulch” reduces weed problems that might pop up if you were to remove it. In the meantime, continue irrigations because there are probably plant roots in that dead lawn that need the water.

Lawn brown spots due to irrigaiton

Check Irrigation

            Check the irrigation system and make sure it's working properly and the irrigation controller is functioning. Kill and remove any weeds in the new lawn area. If using a weedkiller, spray a week in advance so the herbicide has time to disappear before planting.

Soil Prep

The day before planting the seed, irrigate to soften the soil. Rent a core aerator to punch holes all through the lawn area and rake it to remove or break up these cores. 

Reseed and Topdress

            Apply 10 pounds of fescue seed blend per thousand square feet of lawn area. Don't skimp on the cost of grass seed. Good grass seed is expensive. Bad grass seed is cheap.

Fertilize or Not

This is also the time to apply a fertilizer on top of the grass seed if the compost is not a “rich” compost. If the compost has fertilizer in it (a rich compost), don’t apply any fertilizer. Cover the seed with a 1/8-inch layer of compost and water twice a day. When the grass starts coming up in about five to seven days, reduce irrigations to once a day in the morning.

Mow to Thicken the Lawn

            You will see grass emerge first in areas where there is good irrigation coverage. Where the grass is growing slowly, work on improving the irrigation system for better water coverage. Mow the grass no closer than 2 inches when the grass reaches 3 inches tall. Mowing causes the lawn to become denser.

Tomato Theft Might be Rats


Q. I have a raised planter box with my tomatoes doing quite well. Some critter is raiding these tomatoes nearly every night and removing the fruit. I found one of my larger heirloom beauties half-eaten and dropped outside the box about 20' from the plant! What kind of critter might be big enough and strong enough to do this?
I think this is ground squirrel damage to the fruit but the incisor damage would be similar to a rat.

A. I would first suspect rats. Rats are common throughout the Valley, probably the second worst problem after birds, and they will eat anything from fruit and citrus to vegetables including tomatoes and even fresh compost ingredients. Normally, though, they eat fruit still attached to the vine, but they can carry the fruit if they must. But damage to the fruit, because of their teeth, is telling.
Not a tomato but Hachiya persimmon with bird damage. Notice the distinct bird pecking in the fruit.

            The two types of rats present are the roof rat and Norway rat, with the smaller roof rat being more common. Regardless, these critters go after ripe, or nearly ripe fruit. If food becomes scarce, then these critters will go after unripened fruit as well.

Southern Nevada Health District and Rats

            Two nonlethal strategies that might work include getting rid of any hiding places such as low-lying and dense shrubbery or piles of debris and harvesting fruit before it becomes fully ripe. Harvest tomatoes when they are still green, provided the green fruit is starting to change color, and they will still ripen off the vine. This color change occurs first near its attachment to the mother plant, called the “shoulder”, and spreads over the rest of the fruit as it ripens. Harvesting fruit early reduces the chance critters will eat them.
            Rats are good climbers so if you enclose a tomato plant with a cage to restrict their smorgasbord opportunities, use hardware cloth with holes smaller in diameter than your thumb but large enough to allow pollinator entry.
            There is a lot of information on the Internet concerning repellents from mothballs to Fox urine. Like any information on the Internet, you are likely to have mixed results so be aware.
            Regarding lethal strategies, snap traps seem to work the best and maybe the safest method to use if other animals are around.

Apply Fertilizer to Trees When it Cools Off


Q. How much fertilizer should I give my trees in the landscape and when can I do it?

A. Apply fertilizer to established, winter hardy landscape trees late in the season when temperatures have cooled down, trees aren’t growing anymore but they still have leaves. This is called a late fall fertilizer application and substitutes for a spring fertilizer application. In the Las Vegas Valley this would be around late October to the middle of November.
            Apply it to the soil after an irrigation by using a sharpened, round nosed shovel. Push the shovel into the ground as deep as you can and push it forward. Drop a half cup of this fertilizer in the slit made by the shovel and close the slit with your foot.
            If the trees canopy is 10 foot in diameter, use two half cups of fertilizer, one on each side of the tree, 2 feet from the trunk. If the trees canopy is 20 feet in diameter, use six each, half cups of fertilizer, three on each side and spaced about 2 feet apart. If the trees spread is 40 feet in diameter, apply 24 of these half cups in wet soil under the canopy. Turn on the irrigation water in a normal irrigation cycle, let it dissolve the fertilizer in the soil and carry it to the roots.

Skeletonizer Damage on Tecoma Can Look Like Drought


Q. From a distance I thought my Yellow Bells and Orange Bells shrubs weren’t getting enough water because the leaves started turning brown. But when I looked closer, I’m wondering if the brown leaves are because of a fungus on the leaves.  Any thoughts?


A. Look at the leaves of your Tecoma, a.k.a. Yellow or Orange Bells, more closely and I think you will see that the surface of the leaf has been eaten or “skeletonized”. This chewing damage causes the leaves to turn brown; they become brown faster when it’s hot out. At a distance you see the leaves of your Tecoma turning brown and it may look like drought.  Upon closer inspection, you get more detail and can see the insect damage to the leaves and not a disease.
Skeletonizer damage on Tecoma spp. Yellow or Orange bells

            This shrub is native to the Sonoran and Chihuahua and deserts of the Southwest, all through central and even the northern parts of South America, but not the Mojave Desert where it needs slightly more water and warmer winter temperatures. Tecoma and this skeletonizer coexist together. The skeletonizer is the younger stages of a moth. It’s not clear if this insect will survive the low temperatures of our winter or not. If it does, as more Tecoma are planted, we may see more of this insect damage in future years.

Orange bells

            This insect damage is common to Tecoma in warmer parts of the Southwest. It’s feeding damage by the young, a.k.a. larvae, of a moth given the common name Tecoma Leaf Tier Skeletonizer. This damage is like the skeletonizer damage we see on grapes but caused by the young of a different moth.


            Right now, this insect doesn’t usually cause enough damage to warrant spraying an insecticide. Just pull off leaves when damage appears and drop them on the ground. If the damage gets worse in future years, then spraying might be warranted.
            The pesticides of choice are “natural” insecticides called Bt and Spinosad. Apply these sprays just before you anticipate damage or at the first sign of damage. Bt and Spinosad products will kill the larvae of any moth or butterfly, whether it’s good or bad one so be careful.
            Spinosad can be hard on honeybees so don’t spray plants that are flowering and spray at sunup. If you have no choice when to spray, and the plant has flowers, remove them and more flowers will be produced later.

Monday, August 26, 2019

Viragrow: Xtremehorticulture of the Desert: Bedding Plants Y...

Viragrow: Xtremehorticulture of the Desert: Bedding Plants Y...: Another case of poor soil prep....we are in the desert, gotta do it! Xtremehorticulture of the Desert: Bedding Plants Yellowing and Dying :...

Viragrow: Improving Soil with Compost

Viragrow: Improving Soil with Compost: Using Compost to Improve a Soil Adding compost to a soil does two things; it changes the physical structure of the soil and adds plant ...

Wednesday, August 21, 2019

Wednesday, August 14, 2019

Plant Acclimation Necessary for Vegetable Transplants in the Desert

Q. I had three tomato plants, all started from seed. They were all very healthy and thriving beautifully. They were planted in a grow box filled with growing media. After about 5-6 weeks the leaves started curling up on all three plants and after about 2 weeks all plants died. When I first noticed the problem, I looked it up on the internet and it informed me it was a watering problem but not to worry. I didn't worry and they all died.

A. I don’t know if you saved the seed from other tomatoes or you bought the seed and where you bought it. I also am not sure if they were grown as transplants in the home and then moved directly into the garden.

Acclimating transplants (hardening off)

 If these tomato plants were grown from seed inside the home and then moved into the garden, they need to be acclimated to the weather before planting. Inside a home or greenhouse there is protection from intense sunlight, higher humidity and very little wind.

 Acclimate your seedlings to our weather by putting them outside in light shade or the east side of a building. After two or three weeks and you see some new growth, they are ready to go into the garden. Some old-time gardeners will put a wooden shingle on the south side of the plant to give them some protection for another couple weeks.

We used to use coffee cans too. Acclamation helps plants adjust to our desert climate and weather conditions. They go through a lot of shock if planted directly into a garden or grow box from inside a home or greenhouse. Sometimes planting them directly from a protected environment into the garden will cause them to die.

The other possibility can be watering too often and poor drainage. If the soil stays too wet and the soil does not drain water easily, the roots can rot and the stem can develop collar rot. It looks like they aren't getting enough water so most people water more often. Big mistake. The soil needs more amendments and the transplants watered less often.

Roses and Intense Heat

Q.  All my roses face north, and some are against a cinder block wall. They get no shade and they really struggle with our summer heat. Most will have to be replaced. I am already looking at roses to plant for next summer. Do you know any varieties that can withstand our summers? Also, how does Crepe Myrtle handle our summer heat?

A. If your roses are on the north side of a building then they may get direct sunlight late in the afternoon because of where the sun sets in the summertime. That late afternoon direct sun can be very damaging if they have been going on the shady north side all day. Healthy plants handle heat better. Plant both in soil amended with good compost.
Roses growing in the desert should not be planted surrounded by rock.
            Somewhat tender plants to our desert climate, like roses and crape myrtle, handle the intense desert heat and sunlight if they are growing in soil amended with organics and the soil is covered with mulch that rots or decomposes. Roses and Crepe Myrtle will struggle after a few years when planted in soils covered by rock. If you want them to look good in years to come, roses and Crape Myrtle should never be surrounded by rock mulch. Ever.
            Always plant in soils that are amended with a decent soil amendment like compost. After planting, always cover the soil with mulch that rots or decomposes such as woodchips. The woodchips on top of wet soil will decompose. Fertilizing these plants appropriately keeps them healthy, the leaves green and vibrant.
            It might be a good idea to provide some shade from that intense sunlight late in the afternoon. Plant a medium-sized shrub or build a pony wall in this location to provide a less intense microclimate for their growth.
            A list of roses that perform best in desert climates can be found on the Weeks Roses website located at www.weeksroses.com in the column titled, “Roses by Climate”.

Murcott Mandarin Orange Growing Problems

Q. I have several fruit trees planted around my fire pit near a waterfall and pond.  I bought a Murcott tangerine which has not grown an inch in 2 ½ years and the tiny fruit it produces falls off by summer. All the other fruit trees are doing fine except for this tangerine.
Murcott mandarin orange from reader

A. This citrus produces fruit ready to harvest from January through March. It originated from central and southern Florida and does best in locations where freezing is rare. Any freezing temperatures during the winter and early spring may cause the fruit to be inedible. I hope it’s planted in a warm microclimate.

Same Murcott Mandarin orange. 

            Problems like these, when similar plants are growing together and one does poorly, is usually a problem with the soil or how it was planted. Possibly irrigation. During the winter carefully lift the tree from the ground by severing the roots with a sharp shovel and lifting the rootball with two shovels on opposing sides. Gently wash the soil from the roots and put the tree in a clean bucket of water, covering all the roots with fresh water.


            Re-dig the hole so that it’s five times wider than the tree roots taken from the ground. If water drainage was a problem, the tree should be planted about a foot higher than the surrounding soil. Do not use the same soil but replace it with a soil mix amended for planting.


            When planting the tree in this hole, the roots should be less than ½ inch below the finished soil surface surrounding the tree. As soil is added around the roots, add water from a hose to remove any air pockets. Do not step on the soil with your feet but use water to settle it around the roots. Remove about one third of the canopy of the tree after planting. Stake the tree so the lower trunk doesn’t move for one growing season.
            If the soil mix was made with a rich compost, no fertilizer is needed for one or two growing seasons. Otherwise, apply a fertilizer to the soil high in phosphorus when planting. Next spring place fertilizer 4 inches below the soil and about 12 inches from the trunk with a shovel and water it in.

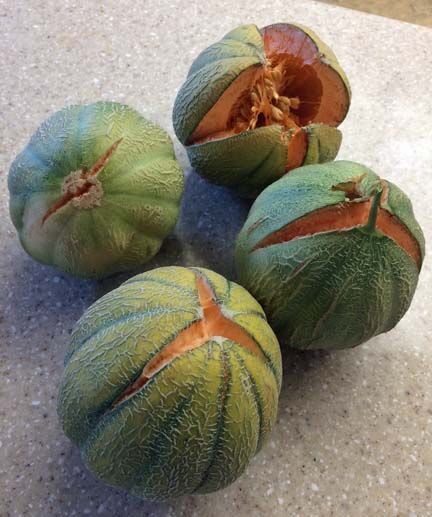
Reason Why Melons Split Before Ready

Q. A second crop of mini-melons I planted split before it was ready to harvest. I think it was the heat because the first crop using same seeds ripened on the vine. These have a mild taste but not very sweet. Is there a "sow by" date so they will ripen before it gets so hot?

A. Melons split before they are fully mature because the soil becomes dry and then watering or rain occurs. The result is burst or split fruit because the fruit swells. This happens with many kinds of fruit, not just melons. The seed inside the fruit may be mature but the fruit hasn’t yet finished ripening before it splits.

Blood orange fruit split

            When a plant is not getting enough water, but the soil begins to dry, the fruit will either abort early or the plant will try to finish as much ripening as possible before the water runs out. This early ripening due to a lack of water can affect the sugar content or its sweetness, the quality of the fruit, the size of the fruit or all three!

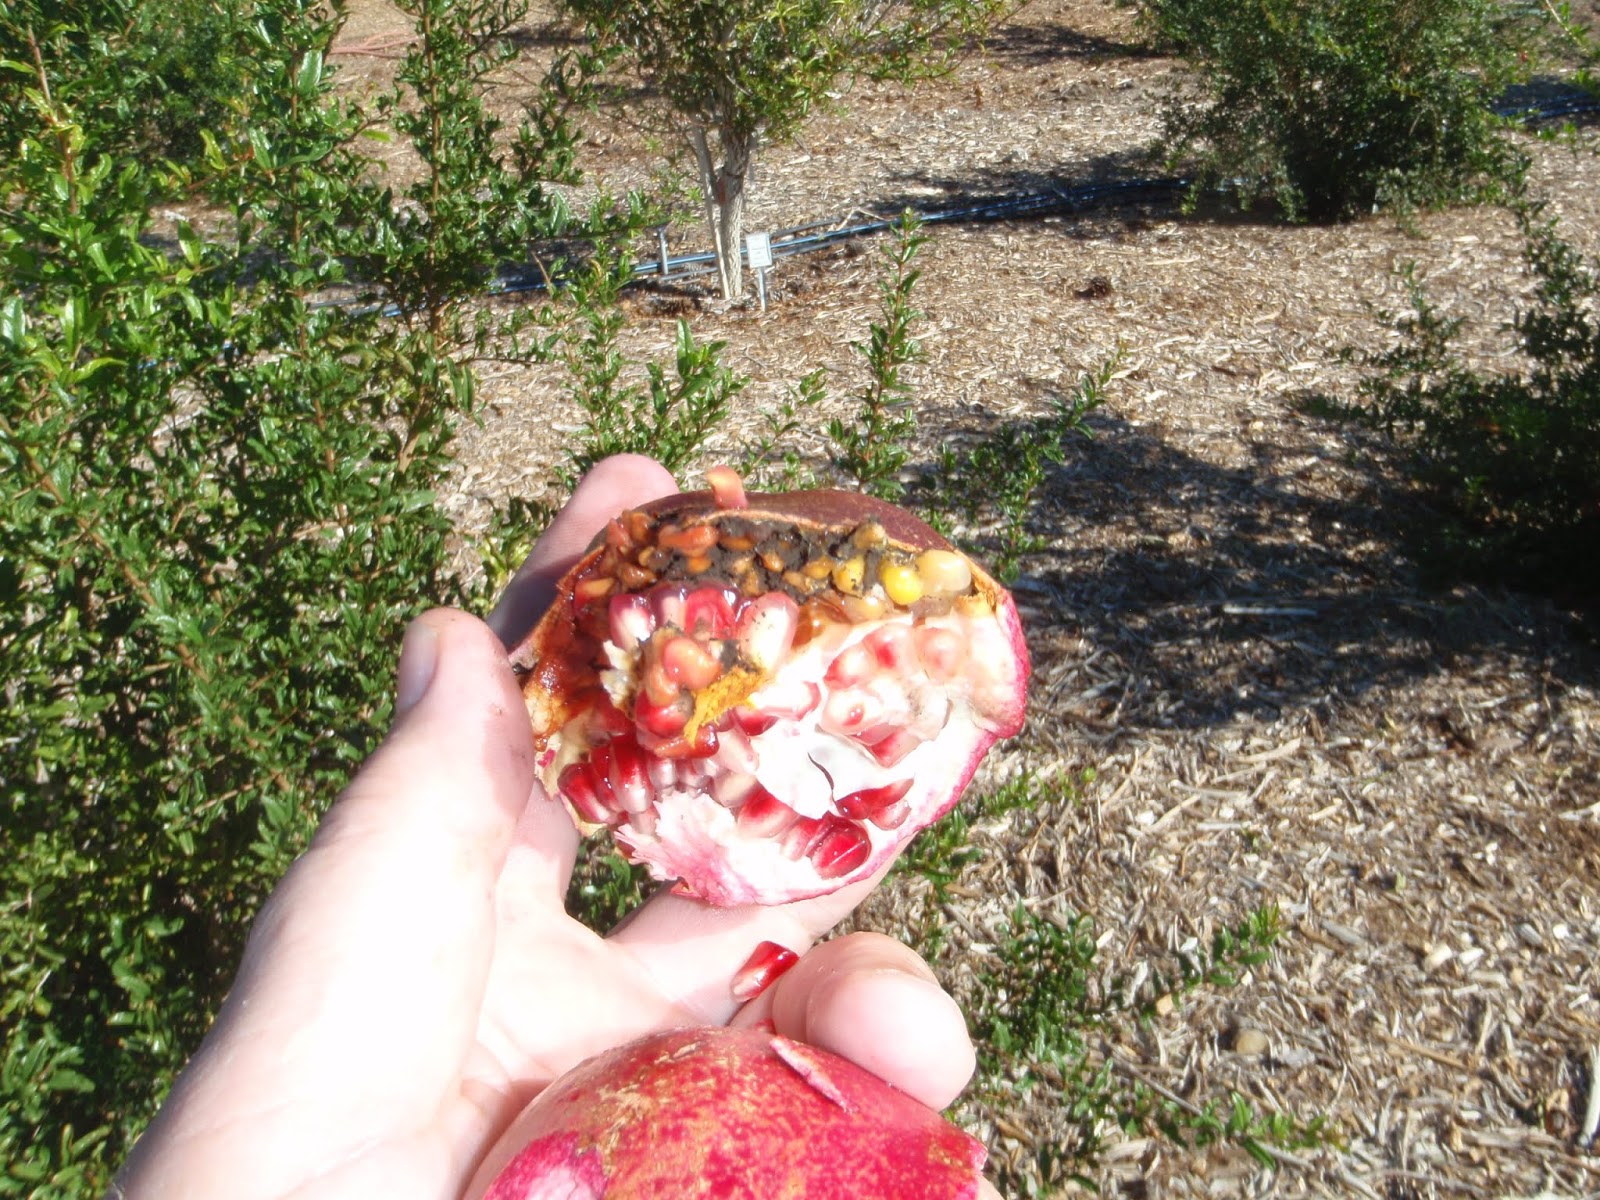
Kara Gul pomegranate split and interior rotted

            When the plant is not getting enough water and begins ripening the fruit, but the soil gets extremely wet again, water is pumped from the roots into the fruit and it splits. The fruit might not be fully ripe, but the seeds are oftentimes mature enough to grow. Applying a thin surface mulch to the soil or growing a variety that shades the soil better and retains soil moisture may reduce fruit splitting during the heat. Also, using a plastic mulch when growing vegetables helps retain water in the soil and reduces splitting.

Myers lemon fruit split

            The sweetness or quality of the fruit depends on many things, but weather and climate are major factors. In fruit and wine culture, this is called the “terroir” of the crop. Therefore, some varieties of fruit produce better quality fruit than others in the hot desert versus coastal California. Try a different variety of mini-melon next time, particularly one that has parents which performed well in hot climates.
Nubiana plum fruit split

            Most of the seed packets tell the days to harvest. If the soil is kept moist, the days to harvest should be accurate. However, add five days to this number if harvesting a fall crop that is normally grown during the spring and summer months. 

Desert Horticulture Podcast: Why Fertilizers Might not Perform Ideally in Desert Soils

Join me in an explanation about the role of organics in desert soils and their impact on applied fertilizers.

Wednesday, August 7, 2019

Butterfly Bush is Not for the Desert but Needs Extra Care if Done


Q. We planted a butterfly bush that was doing good but suddenly took a wrong turn! I’m very grateful for any help and guidance!
Sorry. I dont have a picture of a butterfly bush growing in the desert.

A. There are problems, sometimes, using the common names of a plant. Do me a favor and Google “butterfly bush”. If what you are calling butterfly bush is “Buddleia”, then you have a bush that struggles in hot desert climates unless you keep it out of the afternoon sun. You must improve the soil around this plant at planting time and never plant it in rock, a.k.a. desert landscapes.
            This is a shrub that grows well in Chicago, Illinois. It can be planted as far south as Atlanta, Georgia, so it probably will flower this far south, but I have never heard of it planted in the hot, desert Southwest. In our climate, plant it on the east side of a building where it gets shade in the afternoons. If you planted this shrub in the wrong spot, baby it through the heat of the summer and move it to a new location in October.
            Plant in soil amended with compost. Use woodchips at the base of this plant in a circle at least six feet in diameter. Water it to a depth of 12 – 18 inches and use 4 to 6 drip emitters after it becomes established. Two emitters should be enough for the first two years. Watering frequency would be the same as fruit trees and other non-desert landscape plants.
            This shrub is beautiful when it flowers. It flowers on new growth so it’s best if it’s pruned to the ground during the winter of each year after it is established. Its floral display depends on the plant vigor, fertilizers applied and its overall health. Apply iron fertilizer along with a fertilizer used for roses in late fall just before leaf drop or very early spring.

Drip Tubing Can Be Used for Watering Trees


Q. I was thinking of using soaker hoses around my trees instead of drip emitters. Any advice on that?
Drip tubing has emitters embedded in the walls of the tubing.


A. You are calling them “soaker hoses” but I prefer to call them “drip tubing”. Drip tubing is about half inch in diameter with drip emitters embedded in the tubing walls during its manufacture. Its best use is in areas that need water applied evenly to the same depth, repeatedly.
Drip tubing emitters release a precise amount of water at precise distances apart.

            Drip emitters are added to “blank tubing” (no emitters in the sidewalls) after it’s installed. It’s best for watering individual, smaller plants with spaces between plants that should stay dry. Drip emitters are best for watering different kinds of plants of different sizes with varying amounts of water.
Drip tubing must be under a precise pressure, psi, to work properly.

            Drip tubing is ideal for watering trees over 20 feet tall. A coil of drip tubing can be placed under the canopy of a tree and enlarged as the tree gets bigger. The embedded emitters in drip tubing should be 12 to 18 inches apart under the canopy of the tree. The length of tubing needed depends on how much water is applied. When water is applied under medium trees, it should penetrate 18 – 24 inches deep. When water is applied under large trees, it should penetrate 24 – 36 inches deep.

Citrus Can be Tender in Desert Climates

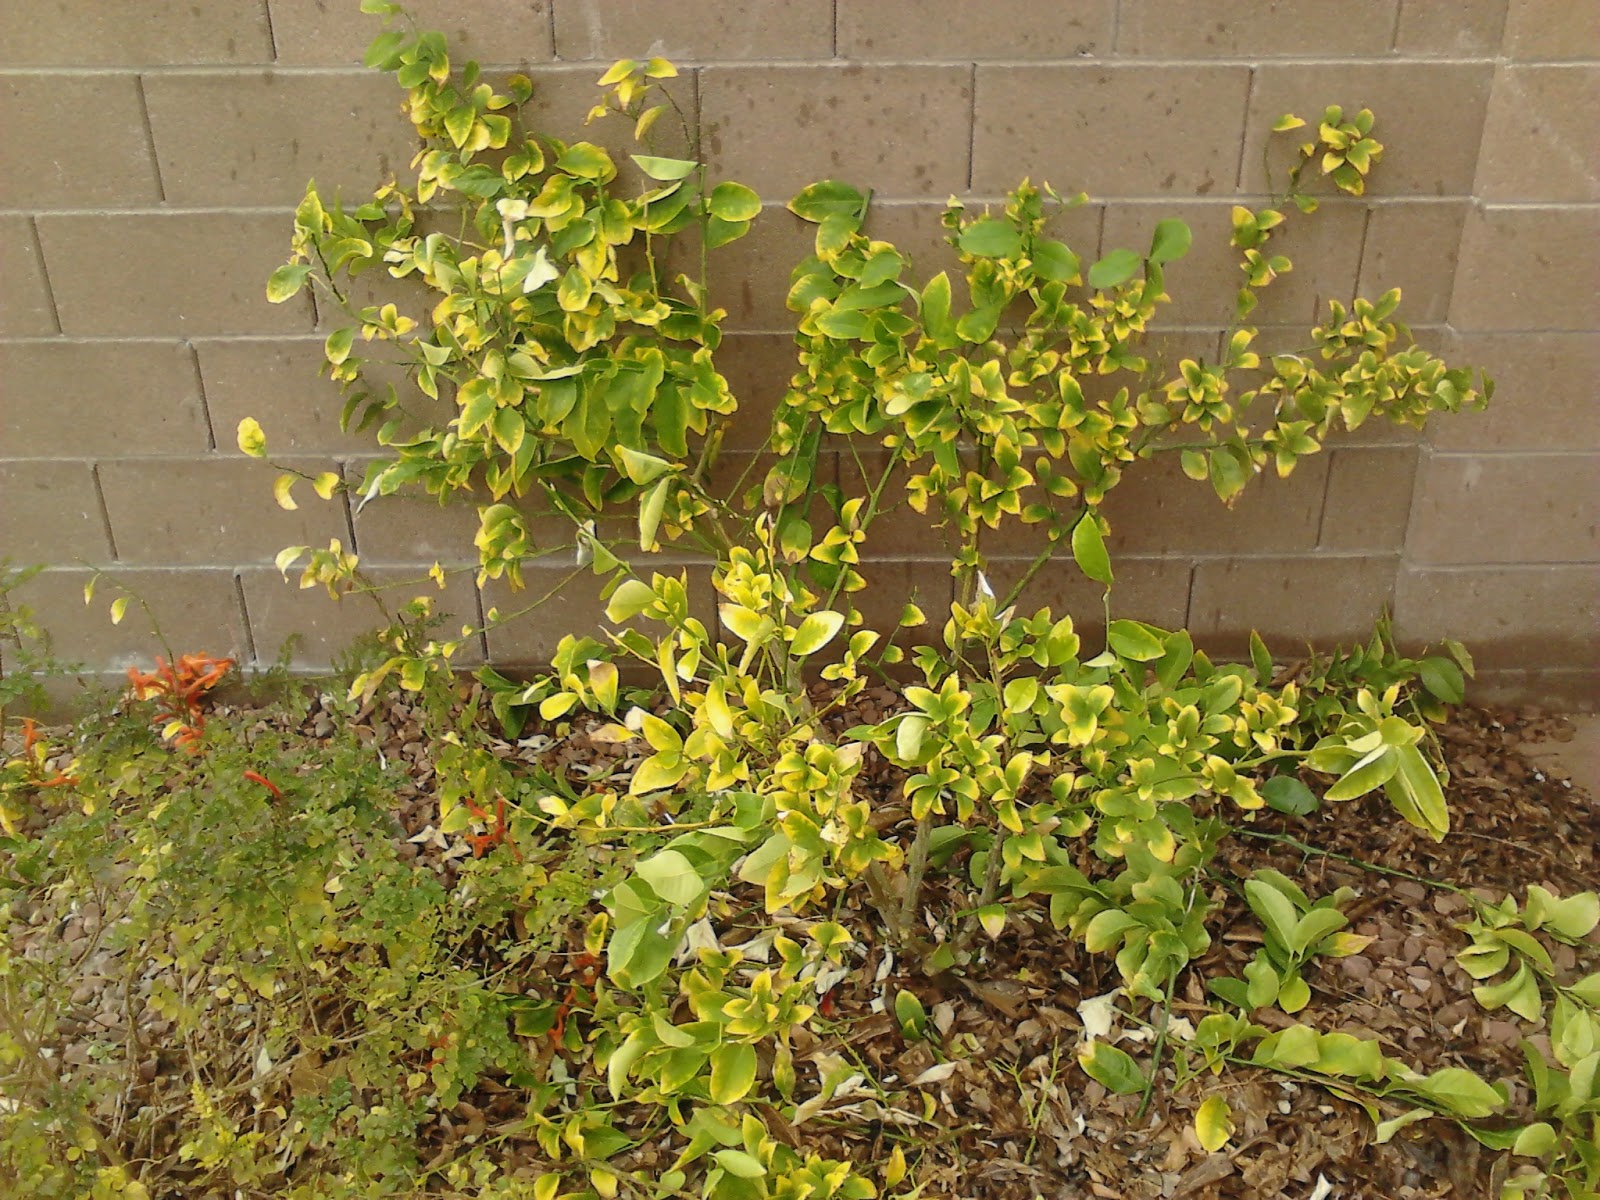
Q. I planted two Mandarin oranges from different nurseries this past spring.  One did very well in full sun from the git-go. The other had leaves that were turning yellow.  I applied iron and nitrogen fertilizers, but it didn’t do much after a week. So, I constructed some shade over at and it started looking green again.

Sometimes plants need to "acclimate" to their new desert climate.
 
A. It sounds like you’ve got your answer; intense desert sunlight caused leaf yellowing. But it begs the question, “why only one of the trees if they were both mandarin orange?” You said the trees came from different nurseries. That might be part of the answer.
            But first, eliminate other potential problems before I get to the nursery explanation. Make sure your trees share the same microclimate, the soil in both locations was similar with similar drainage, the soil mix used to plant both trees was the same, that the roots were kept moist and planted no more than half inch below the soil surface, that they were staked and watered thoroughly after planting.
Sometimes yellowing on citrus can be for other reasons.

            You may be observing differences in how and where your trees were grown versus our harsh, desert climate. A local nursery used to bring in citrus trees for sale in containers and put them in an area that had partial shade. They could put them in full sun and sell them from there, but they didn’t. Too risky.
Sometimes yellowing can be from high light intensity.

            Plants grown in a greenhouse, under partial shade or in a cool, coastal climate produce leaves that are different from leaves grown during our harsh desert sunlight and low humidity. When tender plants are plunged directly into our strong sunlight and low humidity, the leaves may scorch, yellow or drop from the plant. The plant is not dead but quickly produces a new set of leaves very different from its old ones. The newer leaves are smaller, thicker, tougher and better capable of handling desert sunlight and humidity. The plant has become “acclimated”.
Yellowing from an iron problem happens on new growth and lowers the health of the plant making it more susceptible to heat problems.

            Observe where nurseries are selling plants. Plants sold from shady areas may struggle when planted in full sun. Plants grown in a greenhouse need two or three weeks of “acclamation” before they are plunged into an intense desert landscape. This is true of vegetable transplants as well.
            If you suspect you have a plant which may be acclimating to its new environment, sometimes it’s easier to strip off the leaves or prune the plant so its new growth is better acclimated to its new desert environment. In your case, wait until fall and remove the shade. Let the mandarin orange “acclimate” to its new home during the cooler fall weather.

Controlling Ants in Oak Tree

Q.  We have lots of aphids in our good-sized oak trees that are dropping sap on our cars and the sidewalk. Short of cutting the trees down, do you have any suggestions on how to get rid of the aphids?

Not from the reader but aphid sticky exudate on oak.
A. Blame their high population number
s this year on our wet and humid spring weather. The fastest and probably cheapest way to get rid of them is to drench the soil beneath the tree with a systemic insecticide diluted in a bucket of water. This dilution will help you spread it more evenly everywhere under the tree.
aphids on pomegranate
            The pesticide I’m telling you to use has the active ingredient imidacloprid in it. This insecticide is systemic so when you pour this around the base of the tree, diluted in water, the roots will take it up and transport it to the leaves. Since the aphids are sucking juices out of the leaves, they ingest this toxin and die.
Leaf curl on plum from early feeding and leaf expansion

            There are several trade names of this pesticide that contain imidacloprid. The most popular with homeowners is the Bayer product with the trade name “Tree and Shrub Insect Control”. Any product that you use must contain imidacloprid in the ingredients. The easiest and probably safest way to apply it is a “soil drench” but it can be sprayed on the leaves as well.
One of the many products that contain imidacloprid. It is now the most used insecticide in the world. 

            The label will tell you how much of this pesticide is applied to one tree. Follow the directions on the label for a soil drench application. When you are finished with the application, rinse the bucket three times with fresh water and apply these “rinsates” under the tree as well. Wear unlined plastic gloves and eye protection when mixing and applying this product and rinse, or dispose of them, afterwards.
Chitalpa black aphid

            Consider spraying these trees during the wintertime, from top to bottom, with a dormant oil. Apply an extra dose to the base of the tree where aphids might be hiding. Dormant oil sprays applied during the winter are very effective in reducing the populations of aphids, scale insects and spider mites for the next growing season.
Entrance to an ant colony on the orchard floor.

            Ants love aphids. They “milk” ants of this sugary sap for their own use. If you look at the tree trunks carefully, you will see a steady stream of ants going up and down the trunk. They are also part of the aphid problem and should be controlled. Follow the stream of ants back to the opening of the underground nest. Sprinkle 10 or 15 “crystals” of ant bait directly at the opening of the nest. I use a product called “Amdro”. The nest will be empty the next day.

Desert Horticulture Podcast: Grasshoppers, Giant Wasps and the Fruit Salad Tree

Join me in this episode of Desert Horticulture. I discuss the grasshopper invasion, those giant wasps that have been flying around and the fruit salad tree. Is it any good?


Jelly from Yellow Pear Tomato by Reader

I received this recipe for pear tomato jam I thought might interest some of you. 

For many years I helped my mother canning, storing, and making jams and jellies for a family of six. I finally quit making jellies about 4 years ago.

I liked making jellies from strawberries and crushed pineapple; Apricot and pineapple; and Yellow Pear tomato with pineapple.  

My own recipe:
4 cups tomatoes crushed ( I have a 30+ year old Oster chopper
1 8 oz can crushed pineapple
Combine to make 5 cups of fruit (you may need a small amount of water
1-2 teaspoons lemon juice which keeps the jelly from turning dark
7 cups sugar
1 package pectin

Follow the Pectin instructions.

Keep up the good information

Loretta


Desert Horticulture Podcast: Aphids, Drip Irrigation for Trees and Butterfly Bush

Join me on this Desert Horticulture Podcast where I discuss different methods of controlling aphids in landscape trees, using drip tubing instead of drip emitters to water landscape trees and how to use plants that don't belong in the desert, in the desert. Join me as we discussed these and other topics in this Desert Horticulture Podcast. Download my podcasts from Google Podcasts, Apple Podcasts, Spotify, Stitcher, iHeart Radio, and Tune In + Alexa.